
My iPhone 12 Pro Max arrived and I used Quick Start to transfer my data from my iPhone 11 Pro Max. It’s an easy process and one I recommend. Here’s how to do device-to-device migration:
° Turn on your new iPhone 12. The Quick Start screen appears on your current device and offers the option of using your Apple ID to set up your new device. Make sure that it’s the Apple ID that you want to use, then tap Continue. If you don’t see the option to continue on your current device, make sure that Bluetooth is turned on.
° Wait for an animation to appear on your new iPhone 12. Hold your current device over the new smartphone, then center the animation in the viewfinder. Wait for a message that says Finish on New [Device]. If you can’t use your current camera, tap Authenticate Manually, then follow the steps that appear.
° When asked, enter your current passcode on your new device.
° Follow the instructions to set up Face ID or Touch ID on your new device.
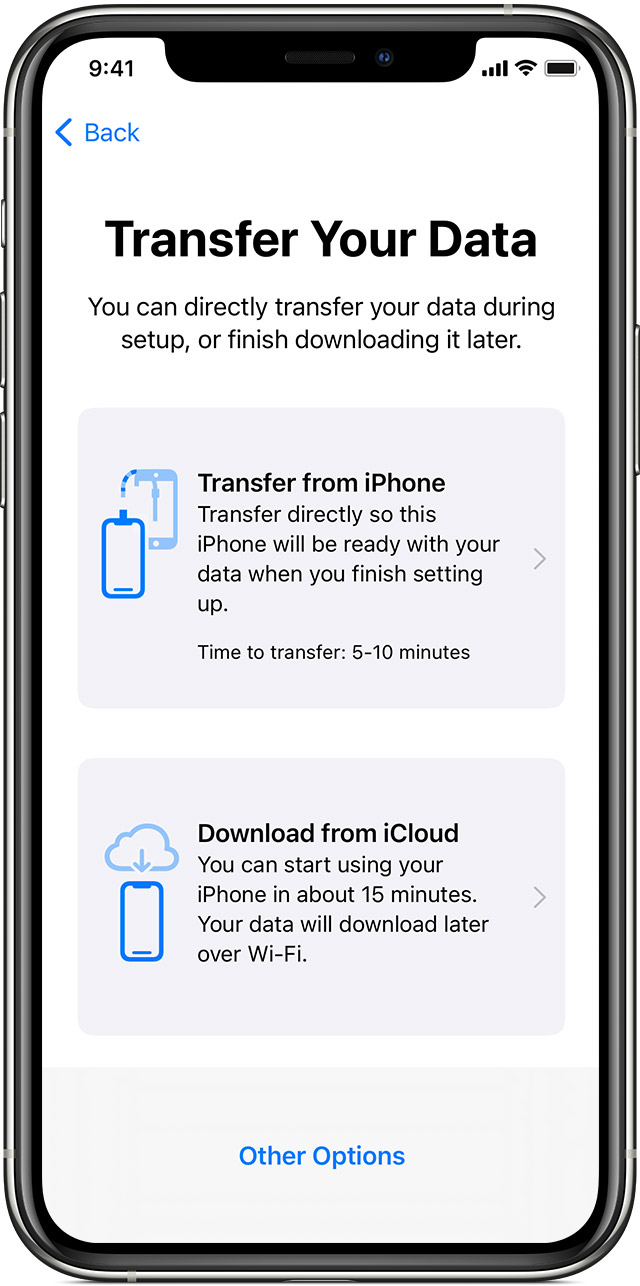
° Tap Transfer from [Device] to begin transferring your data from your previous iPhone or iPad to your new device. If you’re using the wired method, the transfer icon (which looks like two iPhones connected by…well…a wire) indicates that your devices are connected. You can also choose whether to transfer some settings, such as Apple Pay and Siri, from your previous device to your new iPhone or iPad.
If you have an Apple Watch and you’re setting up a new iPhone, you’ll be asked if you’d like to transfer your Apple Watch data and settings.
Keep your devices near each other and plugged in to power until the iPhone data migration process is complete. Transfer times can vary based on factors such as the connection type that you’re using, network conditions, and the amount of data being transferred.
You might choose the wired method if the wireless network that you’re using is slow or congested. To migrate data from one iPhone to another using a wired connection, you’ll need a Lightning to USB 3 Camera Adapter and a Lightning to USB Cable, then follow these steps:
° Connect the Lightning to USB 3 Camera Adapter to power through its Lightning port. Make sure to use a 12W or higher power adapter.
° Connect the Lightning to USB 3 Camera Adapter to your current iPhone.
° Plug the Lightning to USB Cable into your new iPhone, then connect the other end to the adapter.
° Then follow the steps above.
After you transfer to your new iOS or iPadOS device, you might need to complete a few more steps to finish the process. You might need to enter your passwords again for Mail, Contacts, and Calendars. Here’s how:
° Go to Settings > Passwords & Accounts.
° Tap each account.
° Enter your password if prompted.
After you enter your passwords, you might need to check a few other things:
° Mail: Launch the Mail app and wait for your email to download to your device. If prompted, enter the password for your email again.
° Contacts: Open the Contacts app and make sure that your contacts transferred.
° Calendar: Open the Calendar app and make sure that your calendar events transferred.
You might need to open some of your apps to enable the notifications for those apps. Open each app and if prompted, tap Allow Notifications. For some apps, you might need to turn on your Notifications in Settings > Notifications.
What’s more, you may need to redownload the content, such as music, movies, TV shows, or podcasts that you had on your previous device. Here’s what you should do:
° Go to Settings > iTunes & App Store and make sure that you’re signed in with the same Apple ID that you use to make purchases.
° If you’re missing music, movies, TV shows, or podcasts, learn how to redownload the missing content.
Finally, you need to pair your Bluetooth accessories, like headphones and speakers, and connect your device to your car stereo. On your iPhone 12:
° Go to Settings > Bluetooth and make sure that Bluetooth is on.
° Put your accessory in Discovery Mode and wait for it to show up on your iOS device.
° Tap the accessory name to pair it. You might need to enter a PIN or passcode.
(This how-to is based on my experiences and info on Apple’s support pages — where the images sometimes come from.)