

Our iPhones and iPads are wonderful to work with, but when things go wrong it can be difficult to figure out how to troubleshoot and fix issues. For those who live close to an Apple retail store, it’s often easy to just take the ailing device to the store for a quick fix by a Genius. When you don’t have a store nearby and the instructions just seem to be too complex or scary, there’s a great Mac and Windows app called dr.fone from Wondershare that will automatically fix those issues for you. Today, we’ll show you how dr.fone-Unlock easily resolves two common problems that occur with iOS devices:
Clicking these links takes you to full instructions on the Wondershare site, but we prefer demonstrating the dr.fone-Unlock app with a real life example.
Have you ever picked up your iPad only to find that you’ve either forgotten the passcode or someone — like your 10-year-old nephew — has changed it and promptly forgot what he entered? This is a perfect situation that can be handled by dr.fone-Unlock for iOS without the need for any special tech knowledge.
dr.fone-Unlock also works beautifully when someone gives or sells you an iPhone or iPad…but forgot to unlock the device before handing it to you. Maybe you “fat-fingered” the passcode too many times and the iPad locked you out, or perhaps a broken screen has made it impossible to enter the password but you’d still like to get the data off of the iPad.
Wondershare guarantees that you’ll be able to unlock your device within five minutes, and during the process, you will be the only person who can access your data and your account.
To start, just point your Mac or PC web browser to the official dr.fone-Unlock website and click the “Download Now” button.
For Mac users, dr.fone-Unlock runs on macOS 10.14 Mojave, macOS 10.13 High Sierra, macOS 10.12 Sierra, Mac OS X 10.11 El Capitan, Mac OS X 10.10 Yosemite, Mac OS X 10.9 Mavericks, and even Mac OS X 10.8 Mountain Lion. Windows PC users running Windows 10/8.1/8/7/Vista and XP have their own version.
dr.fone-Unlock costs just $59.95 for a 1-year license that can be used on up to five mobile devices, and for just $10 more that license is extended for a lifetime. There are other license packages available for families or businesses, and Wondershare can customize a license package for your needs. Be sure to take advantage of coupon code SENLC01 to take 10% off of your purchase!
The installer program, usually named something like “drfone_unlock_full3359.dmg”, will be located in your Downloads folder. Run the installer by double-clicking the .dmg file icon and then following the easy instructions. Once dr.fone-unlock is installed, it appears in your Mac’s Applications folder.
One important thing you’ll need to do before running dr.fone-Unlock is to disable Find My iPhone or iPad if that has not been done before. In this example, we’re assuming that you can’t get into the device to turn off Find My iPhone or iPad from Settings > iCloud since you don’t know the passcode. To disable Find My iPhone remotely from a Mac or PC:
1 – Make sure the iPad or iPhone is turned off.
2 – Using a web browser on your Mac or PC, visit iCloud.com. Log into your account using your Apple ID and Password. Note that if you have received the devices as a gift or purchased the iPhone or iPad from a third-party, you will need to have that party turn off Find My iPhone/iPad with their Apple ID.
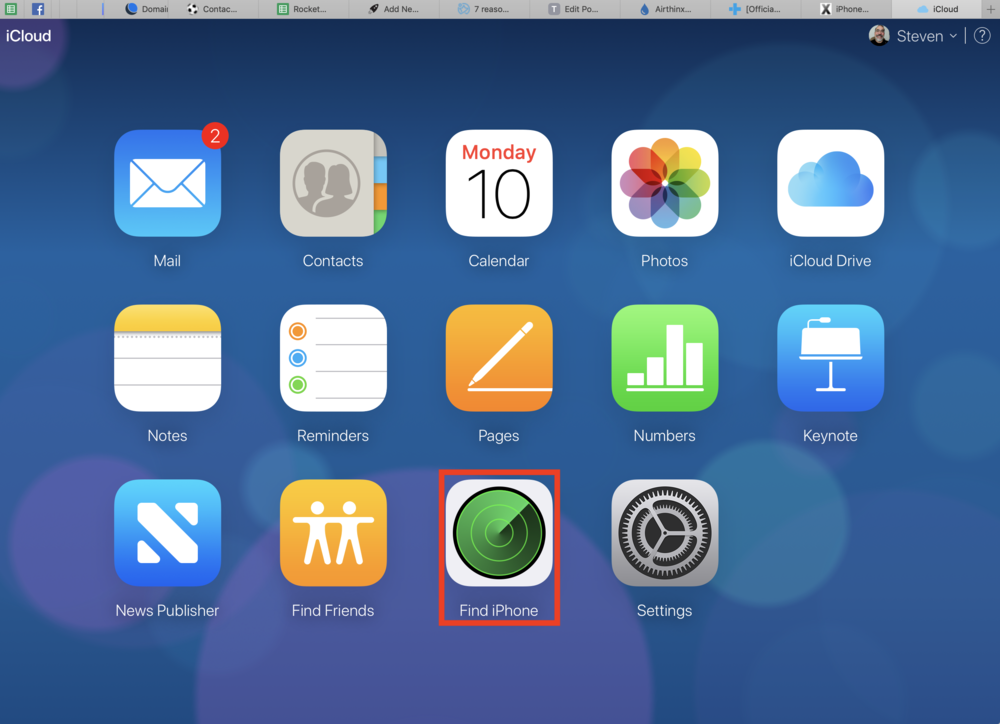
3 – Once you’re logged in, click on Find My iPhone (highlighted in red in the image above), which finds all Apple devices registered to the Apple ID. Click “All Devices” at the top of the map, then select the device you wish to remove from Find My iPhone.
4 – Point your cursor at the device name (here it’s “Autopilot”) on the list, then click the X button to remove your device (see screenshot below):

This is an important step: if you’re unable to disable Find My iPhone or iPad, you won’t be able to restore factory settings on the device. Once it’s disabled, you’re ready to roll! Here we go:
1 – Launch dr.fone-Unlock from the Applications folder on the Mac.
2 – If you haven’t done so already, register the app under dr.fone > Register with the email address you used during purchase and the registration code from your receipt.
3 – The dr.fone screen looks like this, and to unlock the device, you’ll want to click the Unlock button (outlined in red):
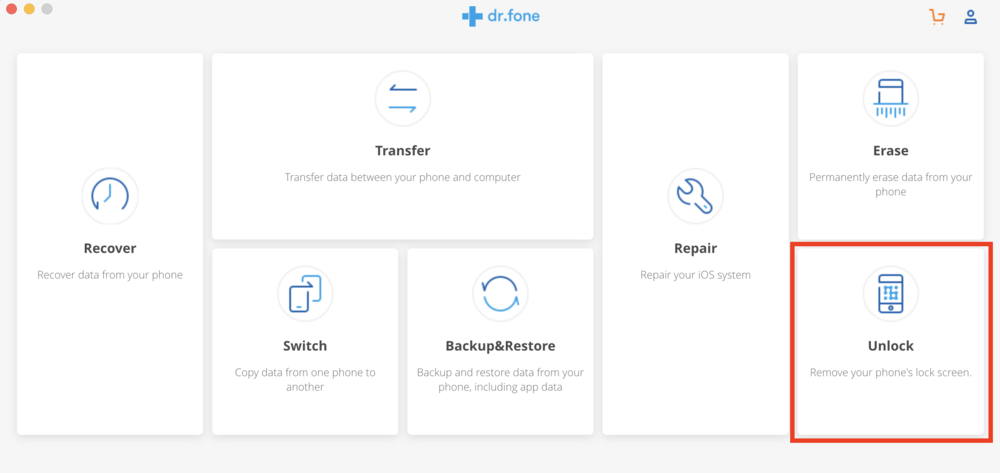
4 – Clicking the button launches the Unlock function of dr.fone and displays the following window
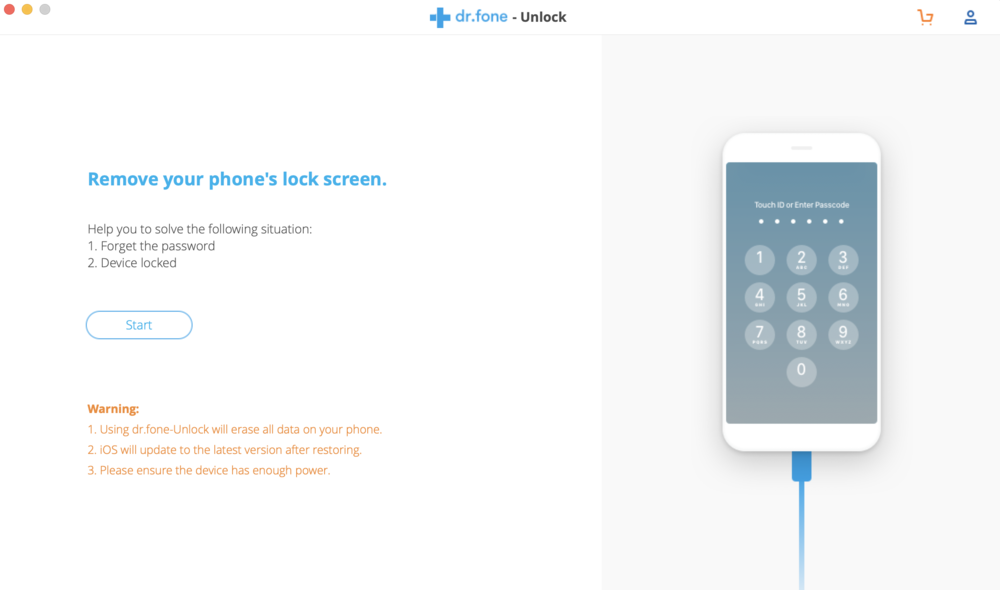
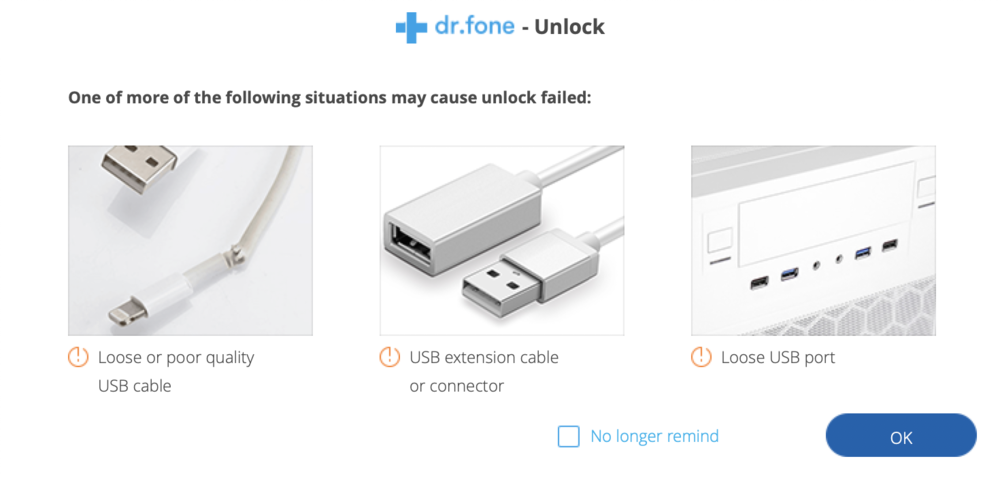
5 – Connect the iPad or iPhone to your Mac using a USB cable, then click Start. A reminder appears (see below) to let you know that certain USB issues may result in failure to unlock your device. Click OK.
6 – Next, you need to place the iPad into DFU (Device Firmware Update) mode. Follow the instructions on the screen in 1-2-3 order: Connect the device (if it’s not already connected), click the Start button, then hold the Power and Home button at the same time, and finally release the Power button while keeping a finger on the Home button. A completely blank screen on your device indicates that it’s in DFU mode.
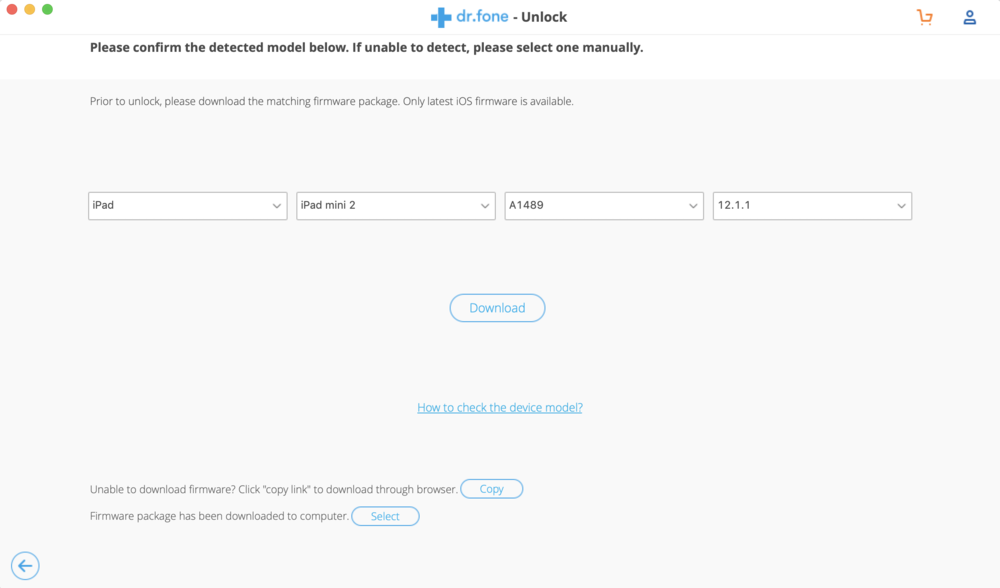
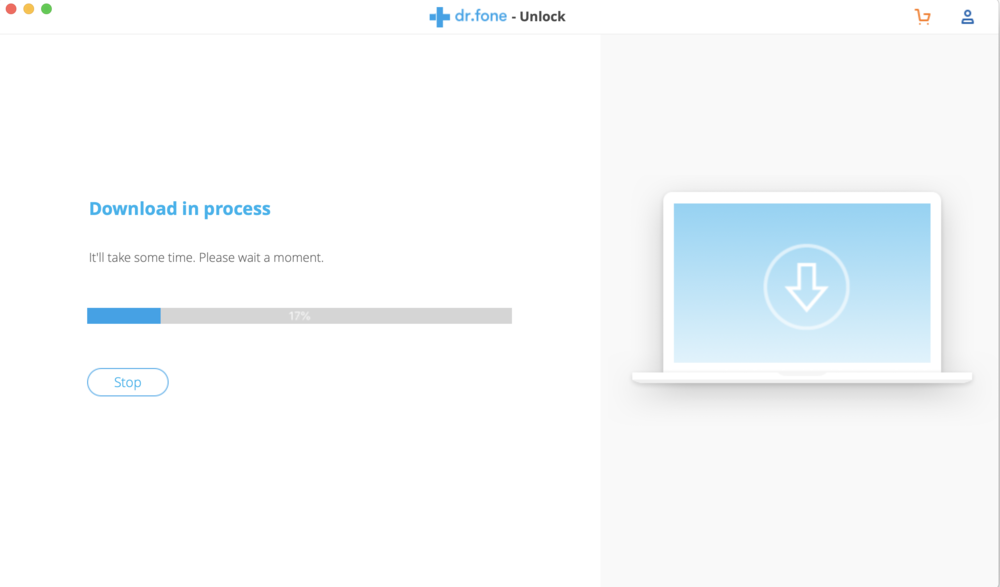
7 – dr.fone then displays the model of device that it has detected (see image above). If it hasn’t detected the model of your iOS device, select one using the pop-up menus. In this case, the device was detect properly. Now click Download to download the proper firmware to reload your device. It is downloaded to your Mac or PC.
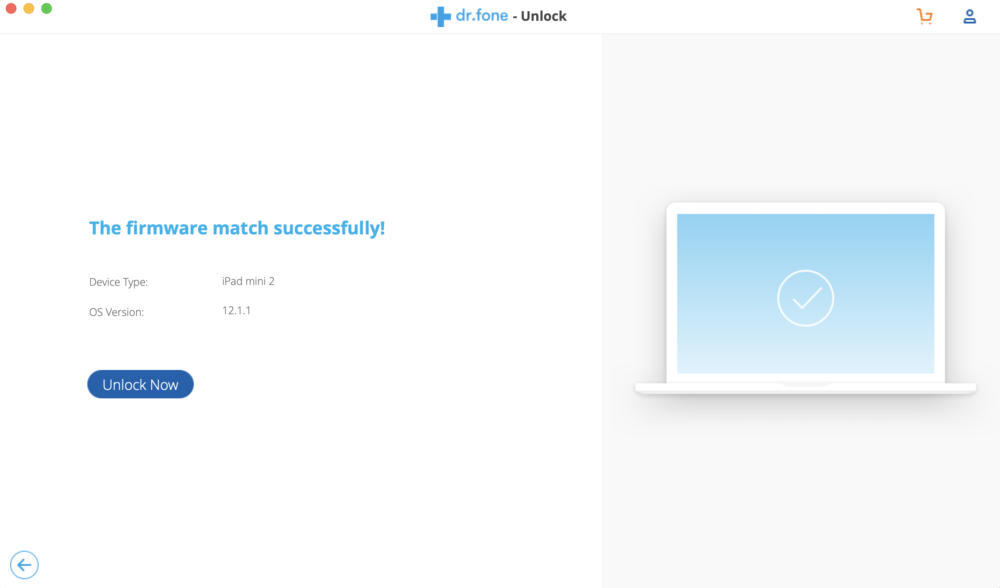
8 – When completed, dr.fone-Unlock displays the screen seen below. To unlock your device, click Unlock Now.
Be sure to keep your device connected and don’t try using it while the unlock process is in progress – failure to follow these instructions could result in your device becoming permanently unusable!
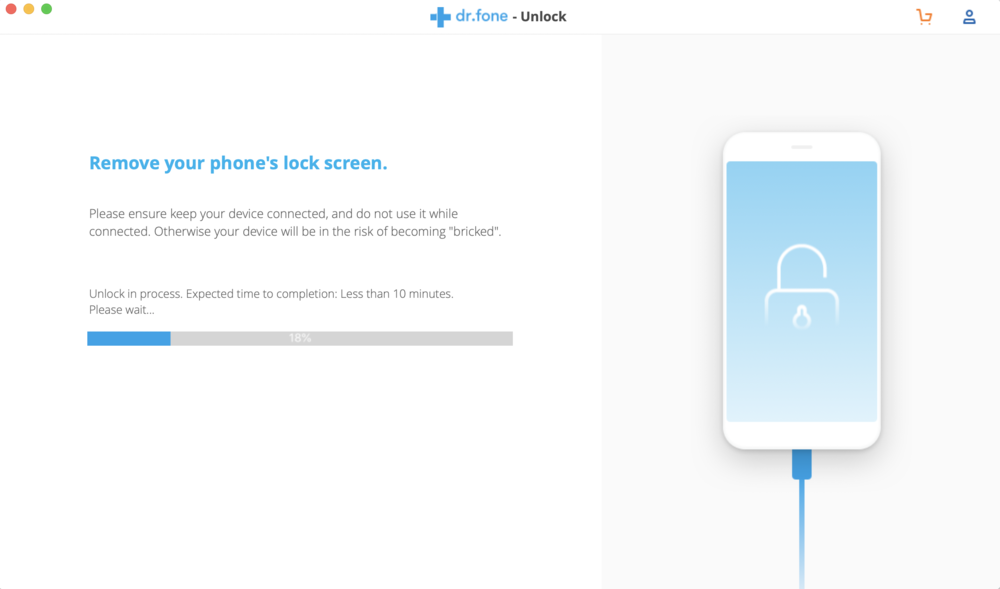
9 – The following screen appears. Wait for your iOS device to reboot, and when it has, click Done. If it fails to reboot, restart it and see if that works. Last but not least, you can always try the Unlock process again.

In this example, the iPad is now able to reboot and — since the firmware had been reinstalled by dr.fone-Unlock — a new passcode can be re-entered during setup. dr.fone-Unlock took me through the process step-by-step with full on-screen instructions.
Note that any data or apps that were on this iPad were deleted; the device reverts back to factory defaults during unlocking. However, if you faithfully kept your iCloud or iTunes backups up-to-date, you can restore from either of those sources and get back to work.
The bottom line? dr.fone-Unlock takes the guesswork out of unlocking any iOS device that is disabled or has a passcode that has been forgotten.


