
Photography apps for our iPhones and iPads let us do some pretty amazing things, all in part due to the supercomputer in our hand being able to control a pretty decent camera. But even the best iPhone camera can’t hold a candle to the flexibility and image-capturing capability of a digital single lens reflex (DSLR) camera equipped with a big sensor and a variety of lenses. The US$125 MSRP MIOPS Mobile Remote ($99.99 on Amazon, Amazon affiliate link) bridges the power of both devices — smartphone and DSLR to create a hybrid device that’s better than both.

If you’d prefer a less expensive option but still want app control of your DSLR, MIOPS also offers the Mobile Dongle (US$37 MSRP, requires separate camera cable) that uses the same MIOPS Mobile app described in this post, but uses a physical wired connection between your iPhone and DSLR instead of the remote Bluetooth connection provided by the MIOPS Mobile Remote. Note that if you’re using a newer iPhone with no audio port, you’ll need to use a Lightning to audio adapter.

Visit the manufacturer website: MIOPS.com for examples of the photography that can be enabled with the MIOPS Mobile Remote or Mobile Dongle.
Design
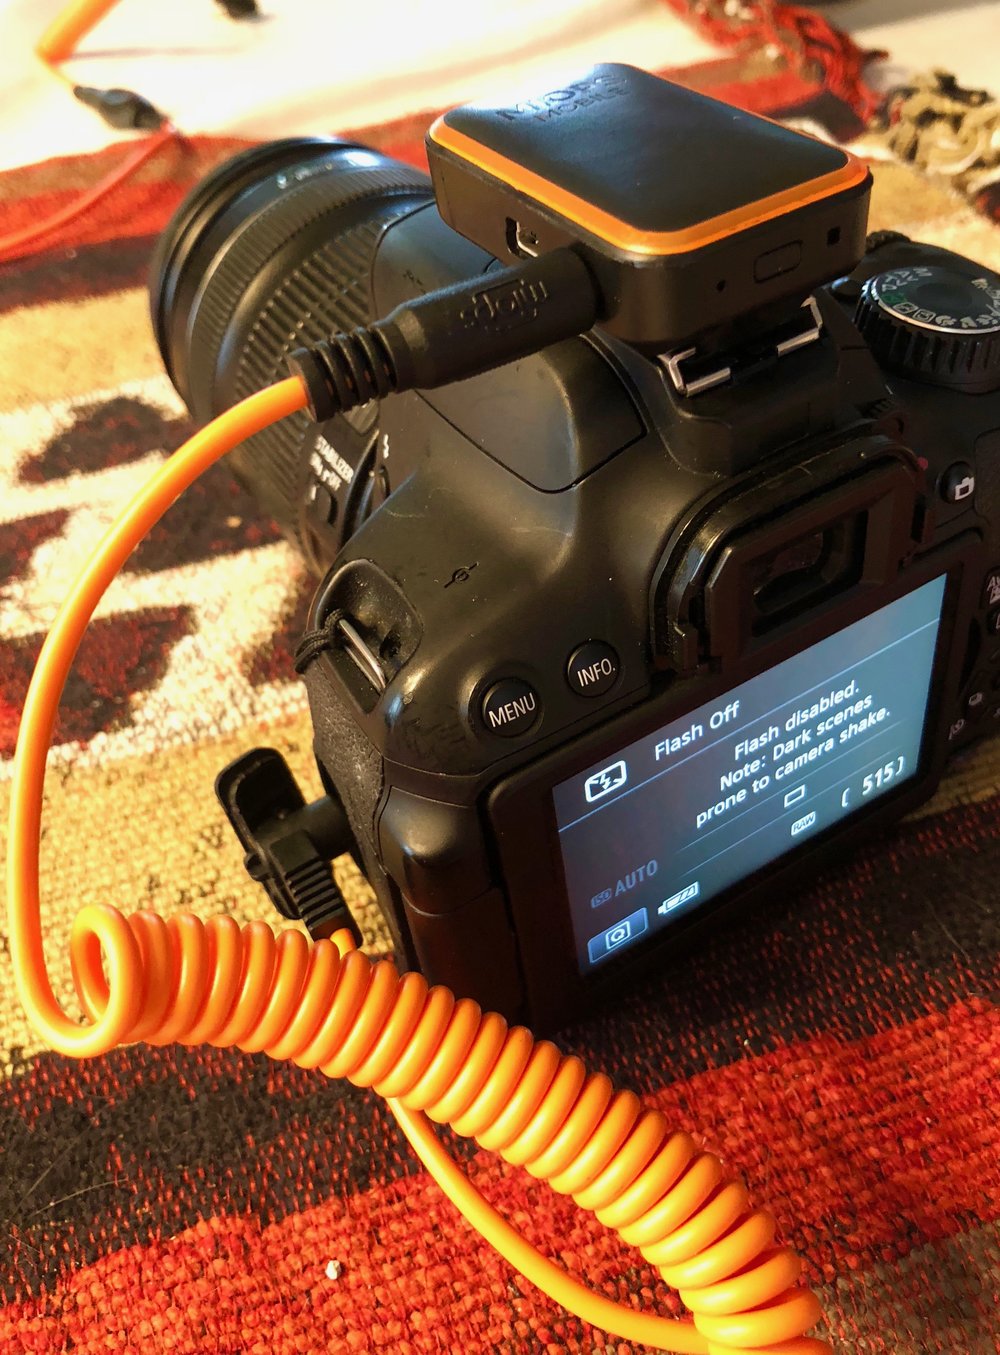
The MIOPS Mobile Remote consists of two equally important parts; the small Bluetooth remote box that connects to any standard DSLR hot or cold shoe and a cable that is specific to a type of camera. For example, my Canon DSLR required a C1 type cable that also works with various Pentax, Samsung, Fujifilm, and Hasselblad cameras. A Nikon would use an N1 or N3 cable, Olympus an O1 cable, and so on. A complete compatibility list can be found on the MIOPS site.
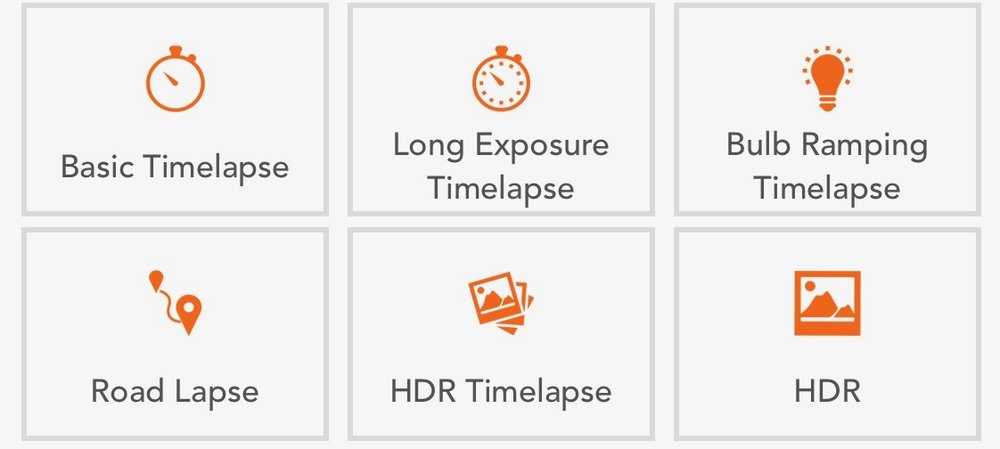
There’s also a software component; the free MIOPS Mobile app for iOS. The app presents a grid or list view of the large variety of cable release, time-lapse, and creative control modes that the combo of app and remote offers.
One smart design feature: the dominant color of the connecting cable and the trim of the MIOPS Mobile Remote is orange, which makes them incredibly easy to find in any camera bag. It’s the little features like this that make the MIOPS Mobile Remote stand out.
Function
Setup of the MIOPS Mobile Remote couldn’t be more simple. I charged the remote box, plugged the cable into both my camera’s remote port and a similar port on the remote box, then slid the remote box into the hot shoe on my Canon. The unit powered on by itself, indicating that by flashing the orange trim on the remote box. An onboard LED also flashes to let you know the remote is ready to pair.
Pairing? So easy even I could do it. When the app is open and you’ve chosen the device you’re using (the app also controls the MIOPS Mobile Dongle), the device appears in the app and is paired with a tap.
With pairing complete, it’s now possible to walk up to 10 meters (33 feet) from the tripod-mounted DSLR and use the iPhone or iPad to perform any of the shutter control features the MIOPS Mobile Remote offers. I tried a variety of them, and they all worked flawlessly with my Canon camera the first time.

Cable Release Modes
When I first started shooting with a DSLR back in the late 1970s, one thing I had to get was a cable release. Back in those days, this was a mechanical device that screwed into a hole on the camera body and could be used to release the shutter without touching the camera — that made it perfect for astrophotography and long exposures, as the camera didn’t move.
The Cable Release Modes for the MIOPS Mobile Remote are similar, but much more powerful. The first is simply a “Cable Release” where touching an orange dot in the app triggers the shutter on your DSLR. Next, there’s a “Press & Hold” mode that’s like the BULB mode on a camera — you hold down the orange app button and the shutter stays open as long as you don’t release the button. “Press & Lock” opens the shutter with the first touch of the orange button, then closes it with the second touch.
“Timed Release” is perfect for those situations where you know that you want a particular exposure to occur — say 30 seconds. You enter the timer duration into a circle in the app, then drag down an orange “cover”. Press the orange circle that you just created, and your exposure begins.
“Self Timer” is for those situations where you want to trigger the shutter when a timer runs down; even our iPhones have a function like this in the Camera app. Finally, there’s a “Timed Release & Self Timer” mode that combines Timed Release and Self Timer, so that you can wait a specific amount of time for a Timed Release exposure to start.
Time-lapse Modes
I love shooting time-lapse photos, but had pretty much given up on doing it on my DSLR while just using apps like Lapse It to do the job on my iPhone. That has one downside; sometimes you need a different lens to get just the right shot…and the iPhone camera only has one or two very limited lenses. The Time-lapse Modes available with the MIOPS Mobile Remote are going to be a big favorite of mine for the travel I have planned for this year.
“Basic Time-lapse” lets you set how many pictures you wish to take and the time interval between them — say, 100 photos taken three minutes apart. Want to go until some event occurs? Don’t enter the number of photos you want to shoot, and the time-lapse continues until you physically stop it.
With your DSLR in BULB mode, the “Long Exposure Time-lapse” mode lets you set the exposure for each frame shot. For doing astrophotography time lapses, this is a perfect setting to use. Finally, the “Bulb Ramping Time-lapse” changes the exposure from an initial value you set in the app to a final value throughout the time-lapse. This is good for situations where you might need a shorter exposure at the beginning of a shot — say right around sunset — and a longer exposure as it gets dark.
Road Lapse Mode
“Road Lapse Mode” in the MIOPS Mobile Remote’s app is sheer genius. What it does is use the GPS in your iPhone to trigger your DSLR to take a photo each time that you go a certain distance. Want to get a fun time-lapse of a trip between two cities? Just mount your camera looking forward through the windshield, set up Road Lapse Mode to take a photo every 50 or 100 feet, and start driving.
One comment — you’ll need a way to import all of those DSLR photos and turn them into a video. Fortunately, most Mac video apps including iMovie can easily do the job for you.
HDR Modes
The HDR (High Dynamic Range) Modes available in the MIOPS Mobile Remote app are perfect for HDR photography, allowing you to set up your DSLR to take a group of exposures with varying exposures, and the Mobile Remote does the work when you tap the orange button.
“HDR Mode” gives you the ability to set the number of frames (3, 5 or 7), the center value, and the EV value (+/-). Once you tap the orange button, it captures the frames for you. An app such as Skylum’s great Aurora HDR 2018 can then be used to process those photos into an awe-inspiring HDR image.
“HDR Timelapse” can be used to take time-lapse videos, with each frame of the video being a HDR photo.
Sensor Modes
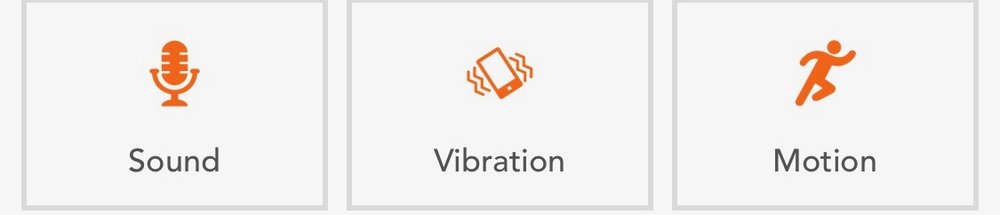
The sensor modes of MIOPS Mobile Remote are absolutely brilliant. “Sound Mode” uses sound to trigger your DSLR to take a photo. For example, let’s say that you wish to take a family photo and get yourself into the picture. Set up Sound Mode to trigger the shutter with a loud noise (say everyone yelling “cheese”), then add a delay of a second or two so you can make sure that everyone is smiling. Sound Mode lets you do either a single shot or continuous shooting, and the threshold value for sound can be adjusted in the app so that you’re not taking inadvertent photos when someone coughs…
“Vibration Mode” does the same with vibration, triggering your DSLR to shoot a photo when your phone detects a vibration. A good example of this would be placing your iPhone (running the app, of course) next to a basketball goal pole, with a DSLR pointed at the net. Every time you make that perfect slam-dunk, the vibration can trigger the DSLR to take a photo of you in mid-air.
“Motion Mode” uses the iPhone’s camera to detect moving objects, at which time it will take a photo or photos. I could see using this for nature photography, where you might be waiting for a bird to land on a feeder. The iPhone camera is pointed at the feeder with the MIOPS Mobile app running in Motion Mode, and when the bird arrives, the pre-set DSLR starts taking photos.
Scenario Mode
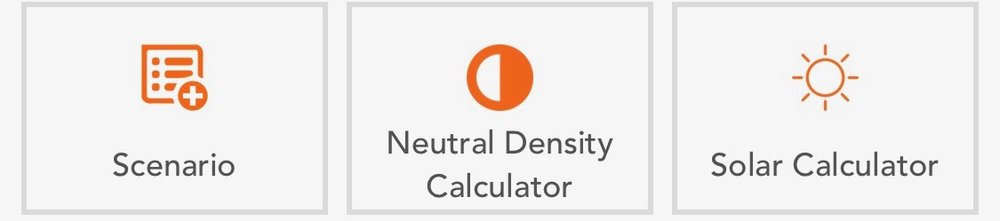
Think you need more than one of these modes? That’s what “Scenario Mode” is all about. It combines any of the other modes to create a custom sequence. It’s possible to add up to five modes, create delays between the modes, and then let the DSLR capture the images automatically in all of the different modes. Think of it as the ultimate DSLR automation tool!
MIOPS also added two really useful tools to the app: a Neutral Density filter calculator, as well as a sunrise/sunset calculator. The latter is perfect for helping you figure out when you’ll get those best “golden hour” photos.
User Interface
I found the user interface for the MIOPS Mobile app to be clear and well designed; I never needed to look at a manual to figure out what I needed to do. That’s a rarity in the world of photography apps — congratulations to MIOPS for thinking through what can be a daunting process and creating a simple and consistent user interface.
In the rare case where a new photographer might need to look at a user guide, there’s a very detailed user guide available for download online.
Who will benefit from the MIOPS Mobile Remote or Mobile Dongle?
If you’re a DSLR photographer who has been looking for an easier way to capture those images that just seem to elude you, the MIOPS Mobile Remote or Mobile Dongle are perfect accessories for your iPhone and DSLR camera. The products might be overkill for the occasional DSLR photographer, but perfect for the photographer who wants to push him or herself further into digital photography.
Conclusion
I’ve tried a variety of other remote iOS-based triggers for DSLRs and found most of them lacking in one way or another. The MIOPS Mobile Remote was the first I’ve found that worked as advertised first time, every time. This product deserves to be in the equipment bag of every serious DSLR photographer.