
Did you know you can use your Mac to take screenshots and grab video from an Apple TV? You can — if your Mac is running macOS High Sierra. Here’s how:
- Turn on your Apple TV, open settings, and choose Network.
- Look under Connection and note the Wi-Fi network name.
- Turn on your Mac, and make sure it’s connected to the same network.
- Launch QuickTime Player.
- In the QuickTime menu bar, select File -> New Movie Recording. A new recording window will open.
- Click the small down arrow to the right of the red record button and a dropdown menu will appear.
- Select Apple TV under both the Camera and Microphone sections.
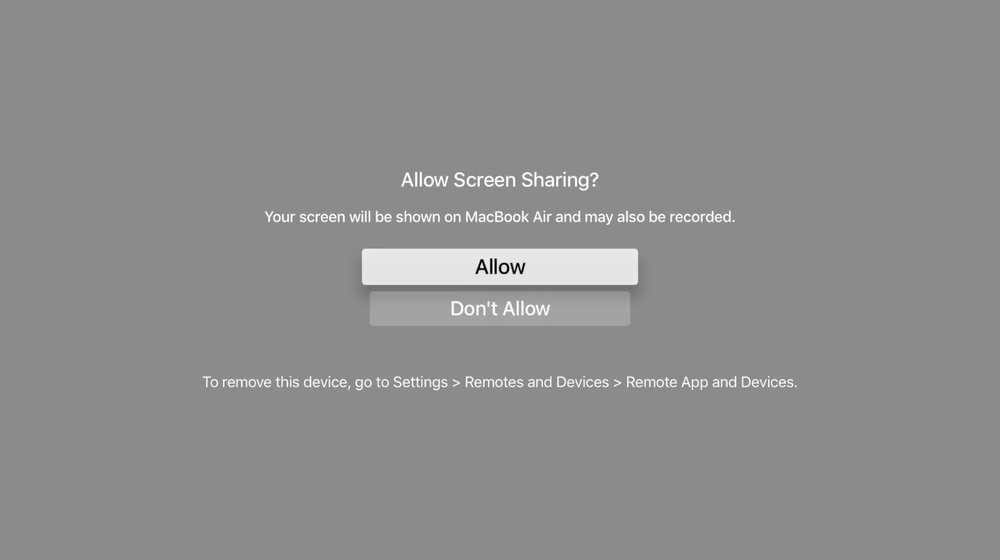
- On the Apple TV, a screen sharing permissions prompt will pop up. Use the Siri Remote and choose Allow.
- Click the red button to start recording.
To take a screenshot on your Apple TV from your Mac, press Shift (⇧)-Command (⌘)-4 and the onscreen pointer changes to a crosshair.
- Press the Space bar. The pointer changes to a camera.
- Move the pointer over the QuickTime Player window, wait until the QuickTime menu and the overlay with playback controls have disappeared, then click the mouse or trackpad to take a screenshot of what’s shown on your Apple TV.
Like this article? Consider supporting Apple World Today with a $5 monthly Team AWT membership.