
You can take an electrocardiogram (ECG) with the ECG app in watchOS 5.1.2 on the Apple Watch Series 4.
An ECG (or EKG) is a test that records the timing and strength of the electrical signals that make the heart beat. By looking at an ECG, a doctor can gain insights about your heart rhythm and look for irregularities.
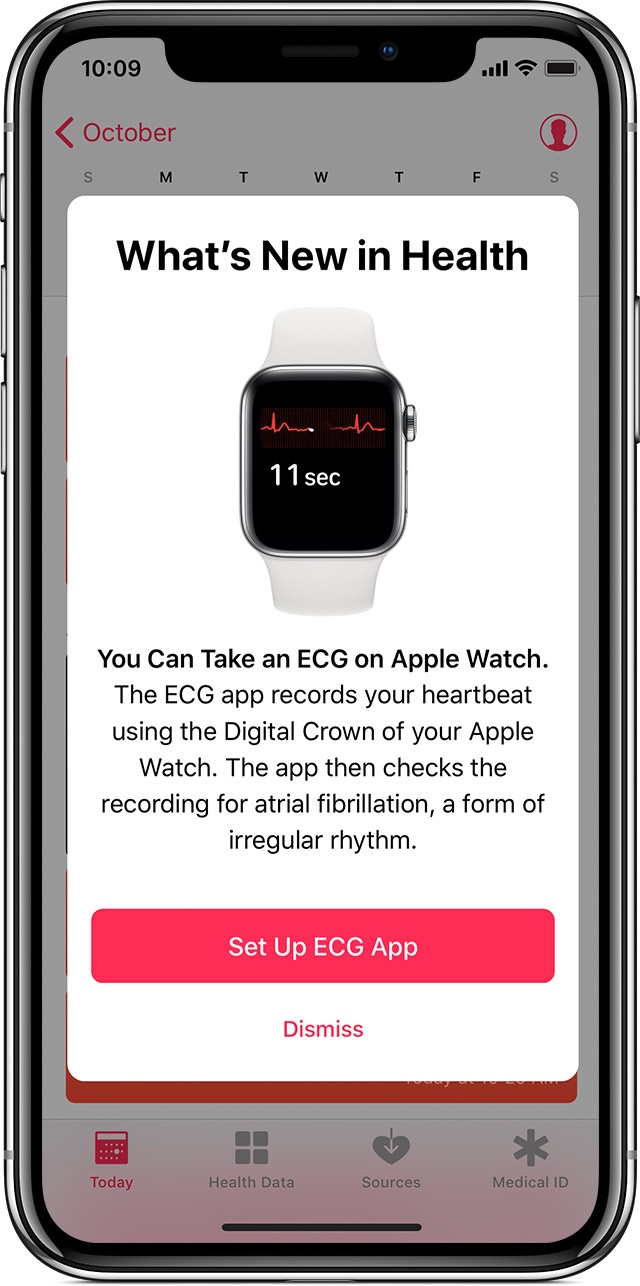
The ECG app can record your heartbeat and rhythm using the electrical heart sensor on Apple Watch Series 4 and then check the recording for atrial fibrillation (AFib), a form of irregular rhythm.
The ECG app records an electrocardiogram which represents the electrical pulses that make your heart beat. The ECG app checks these pulses to get your heart rate and see if the upper and lower chambers of your heart are in rhythm. If they’re out of rhythm, that could be AFib.
To use the ECG app, you’ll need an Apple Watch Series 4 with watchOS 5.1.2, paired with iPhone 5s or later with iOS 12.1.1. To set up the app:
-
Make sure that the software on your iPhone and Apple Watch is up to date.
-
Open the Health app on your iPhone.
-
Follow the onscreen steps. If you don’t see a prompt to set up, tap Health Data > Heart > Electrocardiogram (ECG).
-
After you set up ECG in the Health app, the ECG app appears on your Apple Watch.
You can take an ECG at any time, when you’re feeling symptoms such as a rapid or skipped heartbeat, when you have other general concerns about your heart health, or when you receive an irregular rhythm notification. Here’s how:
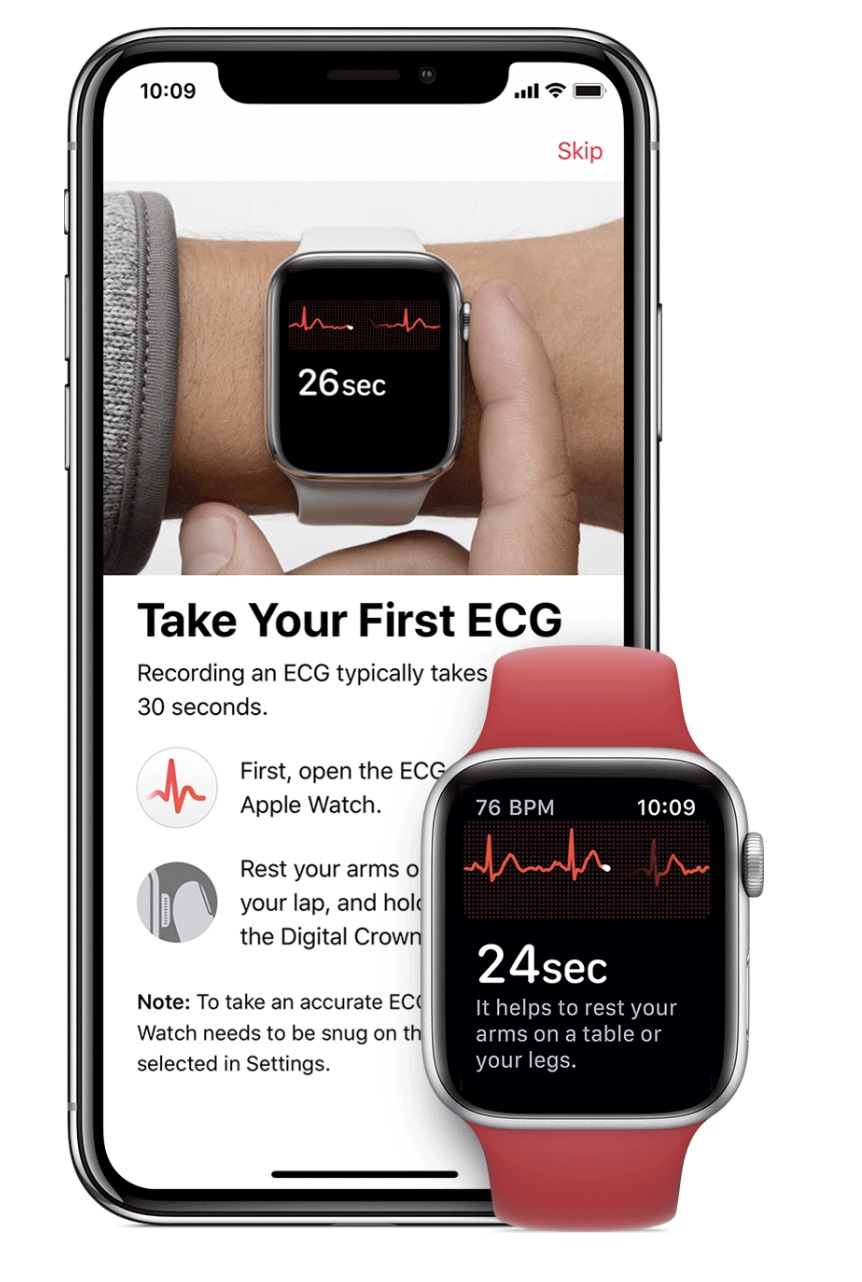
Make sure that your Apple Watch is snug and on the wrist that you selected in the Apple Watch app. To check, open the Apple Watch app, tap the My Watch tab, then go to General > Watch Orientation.
-
Open the ECG app on your Apple Watch.
-
Rest your arms on a table or in your lap.
-
With the hand opposite your watch, hold your finger on the Digital Crown. You don’t need to press the Digital Crown during the session.
-
Wait. The recording takes 30 seconds. At the end of the recording, you will receive a classification, then you can tap Add Symptoms and choose your symptoms.
-
Tap Save to note any symptoms, then tap Done.
The app will walk you through the steps for reading the results.
(This how-to is based on my experiences and info on Apple’s support pages — where the images sometimes come from.)


