
Are you familiar with “color splash” images? In general terms, they’re grayscale images with certain items in their natural color. Selective color is another term for this type of image. Color splash is popular because the images are very striking and a perfect way to highlight a specific color in a photo. In today’s daily tip, I’ll show you how to make a color splash image in Luminar 4 for Mac.
(If you don’t own Luminar 4, you can purchase it through this affiliate link to help support Apple World Today.)
1) Find an image. You can do this in almost any app, or even on your iPhone or iPad. Perfect images for color splash have one very bright color object surrounded by a relatively uniform background of another color. For today’s example, I used this photo of a rose surrounded by greenery — it was taken on my iPhone in portrait mode, so I went into my Photos library and saved it to a folder on my Mac as a .jpg file.
2) Launch Luminar 4. Once the app has loaded on your Mac, you’ll see a screen that looks like this:
I personally like to load and work on one image at a time in Luminar, but you may find it more useful to load a library of images. In this case, I clicked the add ( + ) button in the upper left corner to add a single image to edit. Here it is:
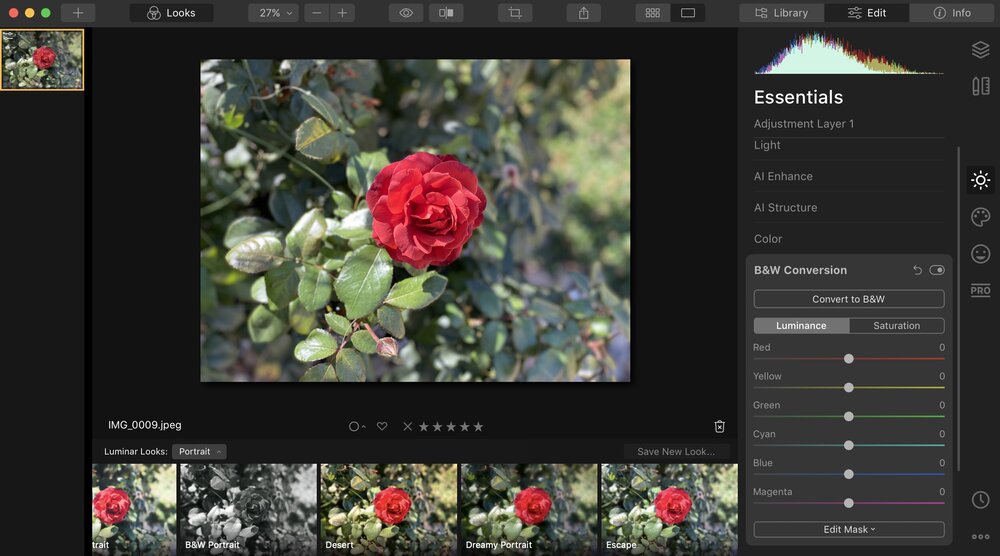
3) With your picture open in Luminar, click the Layers button (upper right) and then click the + button next to Layers to Add a New Adjustments Layer.
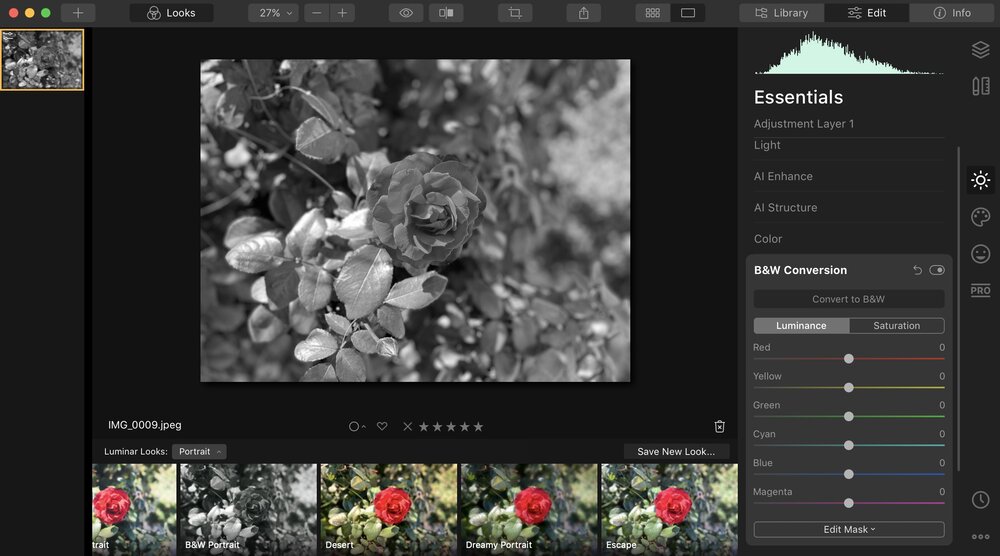
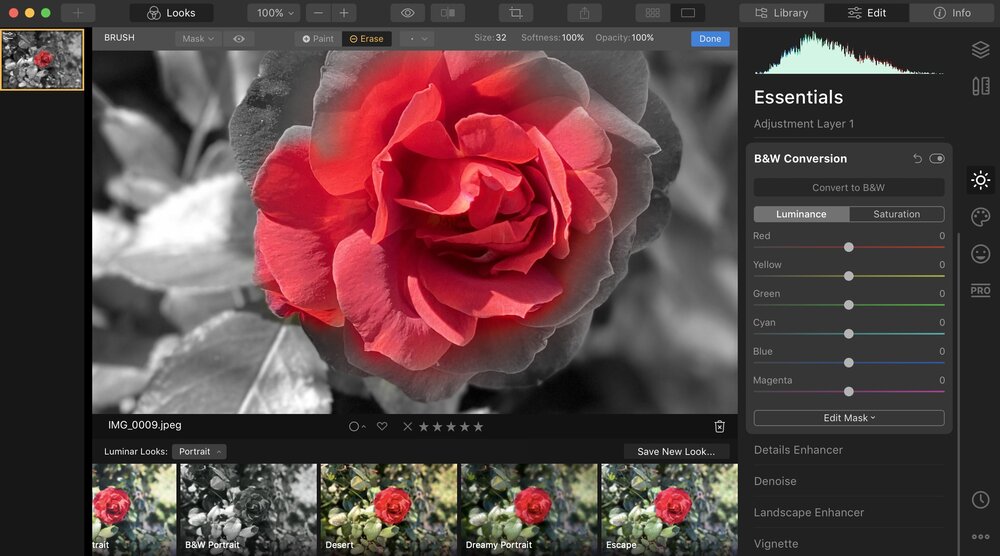
4) With our new layer selected, click the Essentials button on the toolbar on the right side of the Luminar window, select B&W Conversion, then click Convert to B&W. The top layer turns to monochrome, and our image now looks like this:
5) Now, we want to erase part of that monochrome layer that we placed over our color image. To do so, select Edit Mask at the bottom of B&W Conversion, and select a brush. When the brush tool (a circle) appears over the image, click Erase, adjust the diameter of the erase tool, and then begin to “brush away” the monochrome and reveal the color beneath:
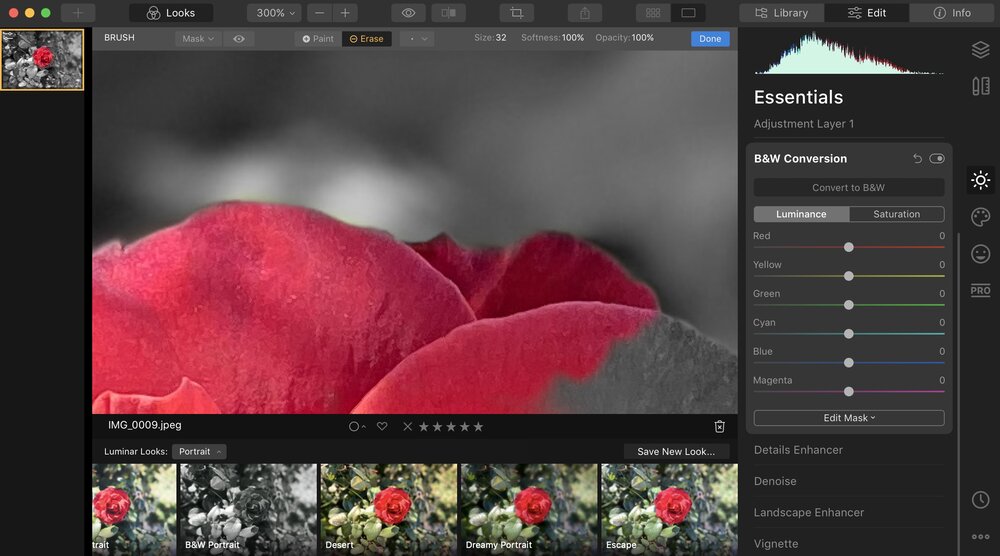
Take your time, and be sure to zoom in on your image to make the edges of the color area precise.If your brush is too big or you’re sloppy and “go over the edge”, just use Undo (⌘-Z) to get rid of your mistake.
I like to use a bigger brush in the center of the color area to make a lot of progress quickly, then zoom in and use a small brush for the outer edges. In the image below, I have zoomed in to 300% to get those details.
Once you’ve completed all of your erasing, click the Done button.
6) Now that you’ve isolated the element that you want for that “splash of color”, you can make other adjustments in Luminar. I like to go back to my original layer and bump up the luminance of the colors so that they really “pop” when I bring my monochrome layer back up.
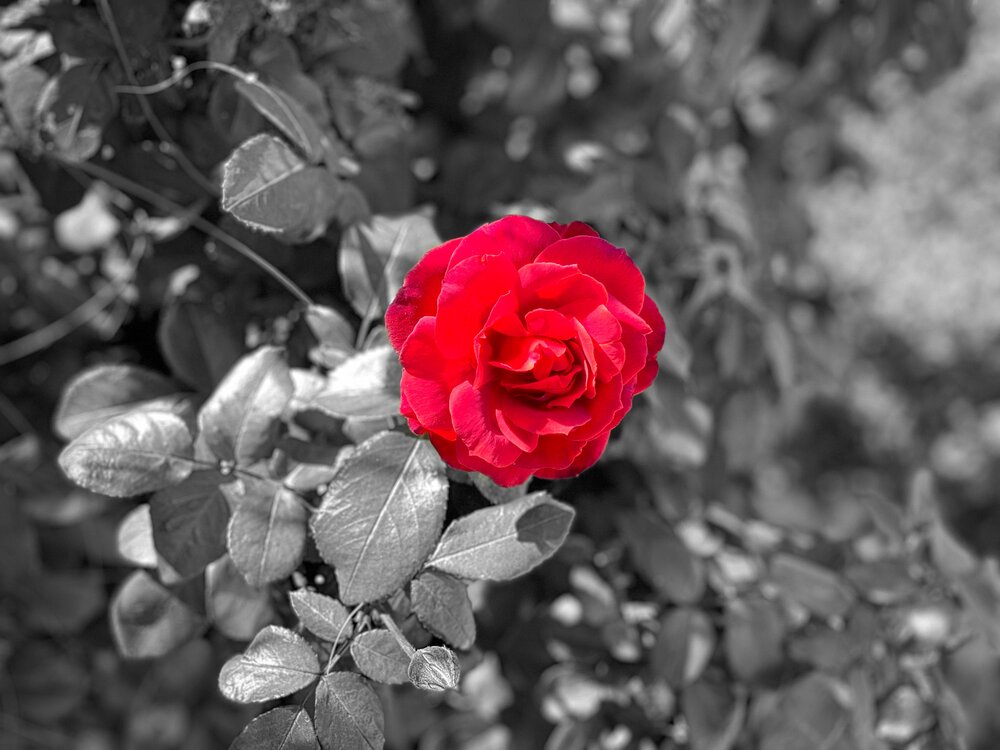
I also added some vignetting to make the corners of the image a bit darker, which brings the eye right to that bright red rose. The final image is shown at the top of this article.
Luminar is much more than just a color splash app — it is a powerful, AI-driven photo editing app for Mac. In future articles I’ll show how to accomplish some other amazing tasks with Luminar.