
My Mac’s desktop is so cluttered with files and folders that it’s impossible to see the desktop image. However, if yours isn’t and you want to change the desktop picture, it’s easy to do.
In the Desktop & Screen Saver preferences, you can change the image displayed on your desktop. Your Mac comes with dozens of desktop pictures to choose from, but you can also use your own pictures, or choose a solid color. Choose Apple menu > System Preferences, click Desktop & Screen Saver, then click Desktop.
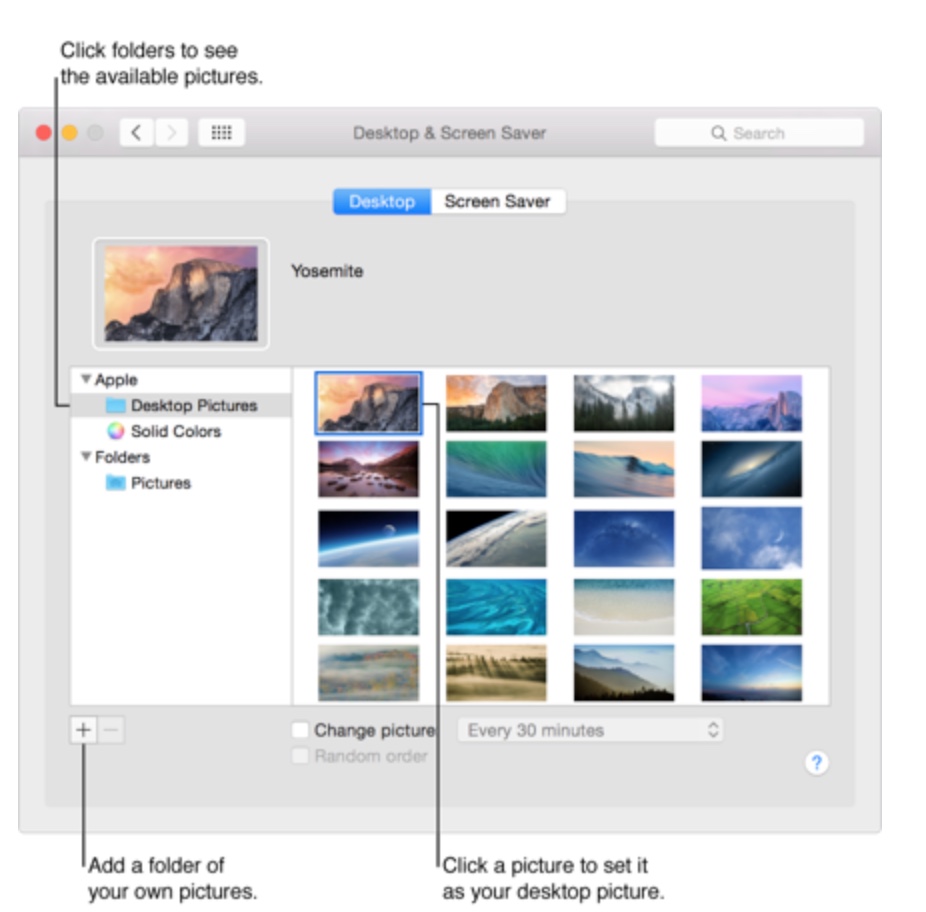
Then find the picture you want to use. To use a picture that comes with your Mac, select Desktop Pictures below Apple. To use a solid color, select Solid Colors below Apple. To use your own picture, select a location below Photos. You can also select Pictures below Folders, if the image you want is in your Pictures folder.
If your image is in another folder, click Add the plus sign, navigate to and select the folder, then click Choose. Click the picture you want on the right.
You can also choose to have a screen saver start when you aren’t using your Mac. To do so, choose Apple menu > System Preferences, click Desktop & Screen Saver, then click Screen Saver.
Click the screen saver you want on the left. Previews are shown on the right.
Set any screen saver settings below the screen saver preview on the right. If necessary, click Screen Saver Options. For example, click the Source pop-up menu to choose the location with the pictures you want to see in the screen saver.
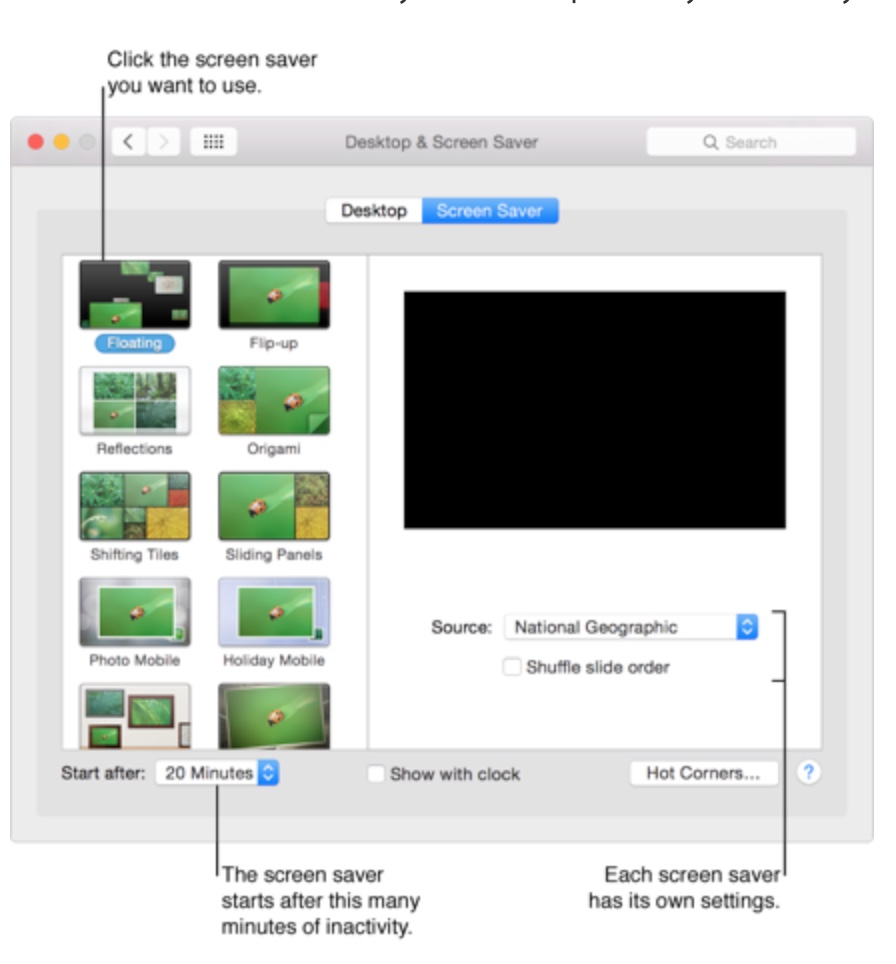
Click the “Start after” pop-up menu, then select an amount of time. The screen saver starts automatically after your Mac has been inactive for that amount of time.
Select “Show with clock” to show the time when your screen saver is on. Click Hot Corners to set a shortcut for starting your screen saver.
To stop the screen saver and return to the desktop, press any key, move the mouse, or touch the trackpad.
You can give your desktop a darker look by setting your menu bar and Dock to be dark. Choose Apple menu > System Preferences, then click General. Select “Use dark menu bar and Dock.”
Finally, you can use the General pane of System Preferences to choose new colors for buttons, menus, windows, and highlighted text. Choose Apple menu > System Preferences, then click General. Click the Appearance pop-up menu, then choose Click the “Highlight color” pop-up menu, then choose the color you want.