
Our iPhones and iPads are wonderful content creation devices, and by that, we mean that they can be used to perform so many different tasks, like taking high resolution photos, shooting 4K video, recording songs or sounds, or even writing books. We use them to capture the information in our lives, such as contact data for friends, business associates and relatives. Although storage capacity on these devices has increased, it’s still quite possible to fill them up with all of that content.
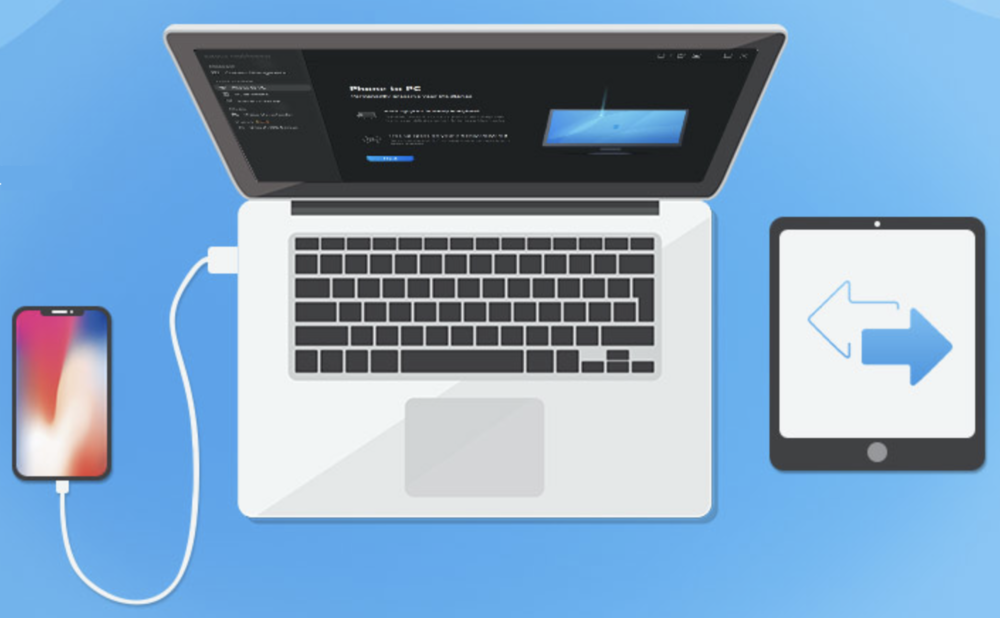
EaseUS MobiMover for Mac and PC is a powerful tool for transferring data from your Apple mobile device to your computer, managing the variety of files that you create, and moving those huge videos quickly off of your iPhone or iPad. Want to download videos for viewing on your mobile device? MobiMover helps with that, too.
Transferring Large Video Files from iPhone/iPad to Mac or PC
One of the most common uses of MobiMover is move video from your iPhone or iPad to your Mac or PC. Let’s face it — iPhones have incredibly good cameras that are capable of taking 4K ultra-high resolution video with stereo sound at 60 frames per second. There’s only one problem — some of those files are so large that they can take a very long time to transfer over Wi-Fi.
Our friends at EaseUS wrote an article about how to Transfer Video from iPhone to PC in 5 ways that demonstrates the advantages and disadvantages of the different methods available to transfer video. While the article is more oriented toward Windows users than the Mac users who read this website, the bottom line is the same — the fastest way to transfer video from your iPhone to your computer is by using MobiMover and a USB to Lightning cable.
The process is very easy. Download MobiMover to your Mac or PC, open the Disk Image (.dmg) file that you get onto your Mac, and you’ll see the following screen:

Just drag the EaseUS MobiMover icon to the Applications folder in the window, and it’s installed into the Applications folder on your Mac. The installation process for Windows is just as easy.
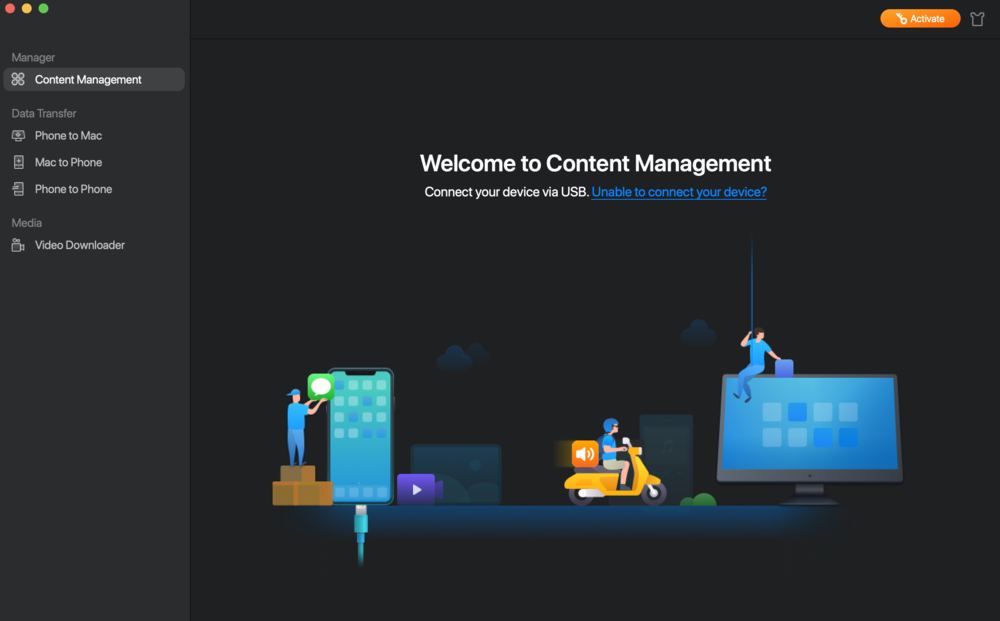
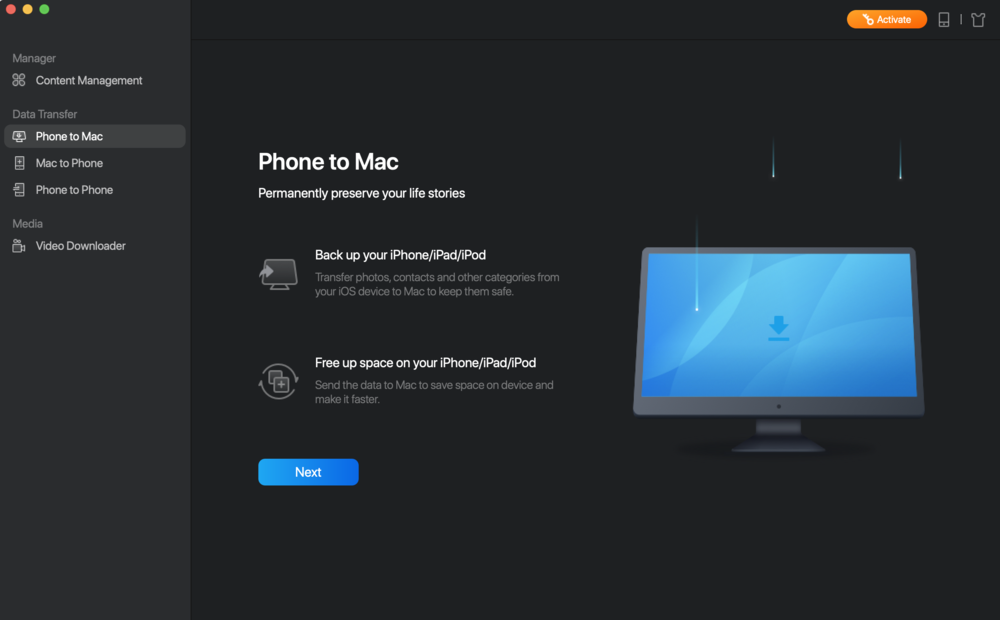
Launch MobiMover, and you’ll see this attractive and simple user interface:
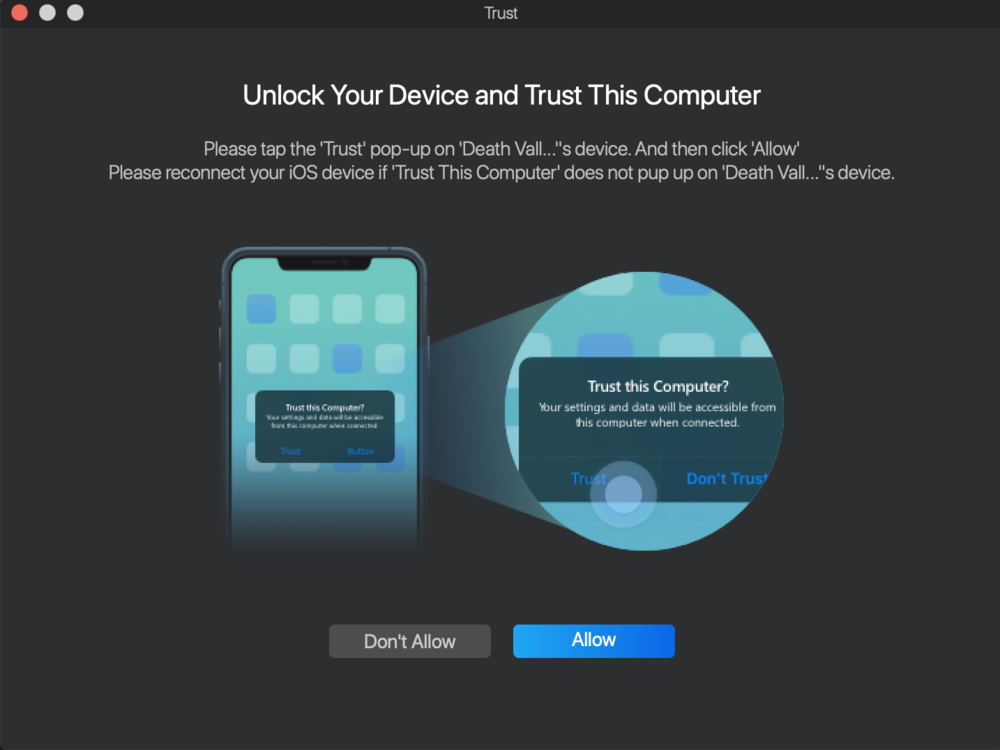
To get started, simply connect your Mac and iPhone with a USB to Lightning cable. On your Mac, the following screen appears:
Follow the instructions, unlocking your iPhone with passcode, Touch ID or Face ID, then tap Trust. On the Mac, click Allow.
Now MobiMover begins a scan of the content on your iPhone. This may take a few minutes depending on how much content you have on your iPhone. When it’s completed, you see exactly how many files and how much space they take up on your Mac:
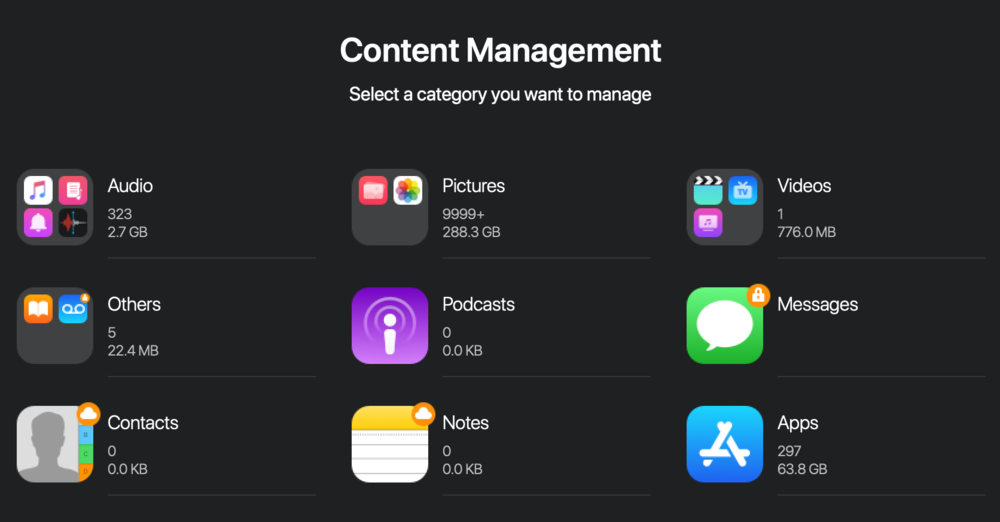
Items that are synced in iCloud are shown with a small “cloud” icon, like Contacts, Notes, and Messages in the image above. If you don’t use iCloud, all of the different types of content will show a certain number of files and the storage space used.
To pull down the one large video file that is stored on the iPhone in this example, we just click on the Videos category. It turns out that it is a TV show that was loaded onto this iPhone:

Click on the TV Shows subcategory, and we see that it’s the classic Star Trek episode “Balance of Terror”:

To transfer this video file to a Mac, we simply click the Transfer to Mac button. Once the file has been moved to the Mac, click Delete and free up the space taken up by the video.
While this example shows a pre-recorded TV show being managed by MobiMover, the content you record on your iPhone is managed the same way. It’s simple, clear, and fast. Now let’s look at another example…
Syncing Contacts from iPhone to Mac with and without iCloud
Contacts are probably the most personal content on your iPhone, and if you have a lot of friends, relatives and business associates listed in the Contacts app, you definitely don’t want to lose that information. EaseUS has produced detailed instructions on how to sync your contacts from iPhone to Mac with iCloud, but what if you don’t use iCloud?
That’s where MobiMover comes in handy. With the MobiMover app open on your Mac and your iPhone connected with a USB to Lightning cable, click Phone to Mac on the left sidebar, then click Next…
On the next screen, you’ll be asked which categories you want to transfer to your Mac. You can choose the default location to transfer to —- your Mac desktop — but it’s a much better idea to create a folder on your desktop first, then click on the location to choose that folder.
In this example we’ve selected Contacts and a “Contacts Backup” folder. Before we transfer the Contacts, we go into EaseUS MobiMover > Settings, and make sure that we’re bringing the contacts over in vCard format (HTML and CSV formats are also available).
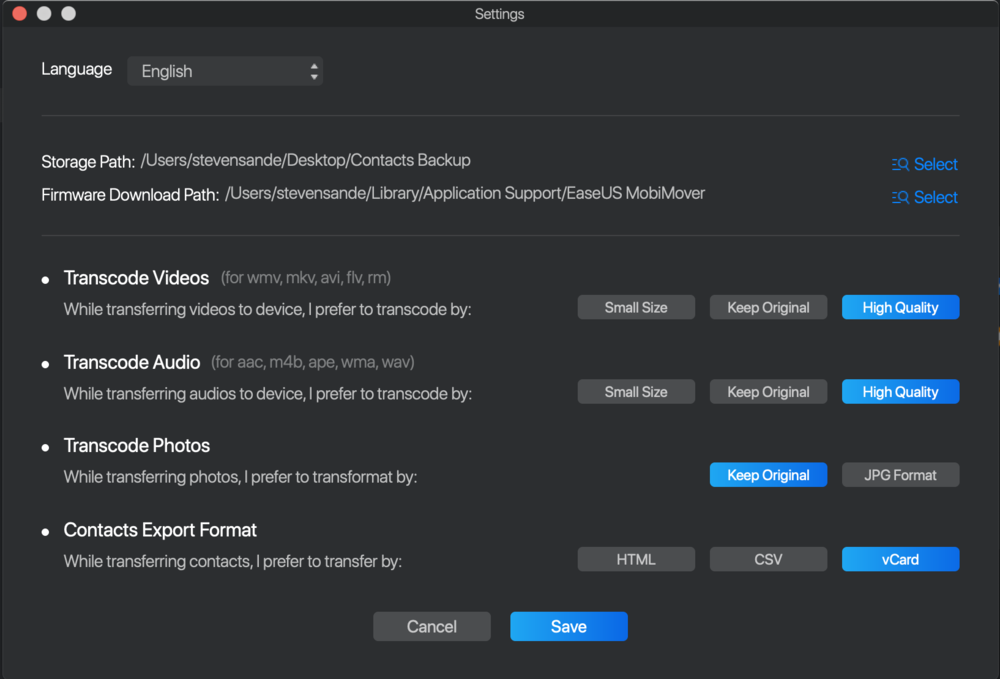
Click Save to keep our settings, then click the Transfer button on the main MobiMover window. In seconds, the contact vCards are moved to the Contacts Backup folder we created.
If we need to import those contacts into the Contact app on a new Mac, we just need to launch the Contacts app on the Mac, select all of the vCards that were just transferred to the Mac, and drag them to “On My Mac”.
Try MobiMover for Free
You can try MobiMover for free by clicking any of the links above and downloading it, then consider purchasing MobiMover if you need to transfer more than 20 files per day. Just need the ability to move files before an upgrade? Grab a one-month license to MobiMover Pro for $29.95. For $39.95, you can subscribe to MobiMover Pro for a full year, or get a lifetime license for just $79.95.


