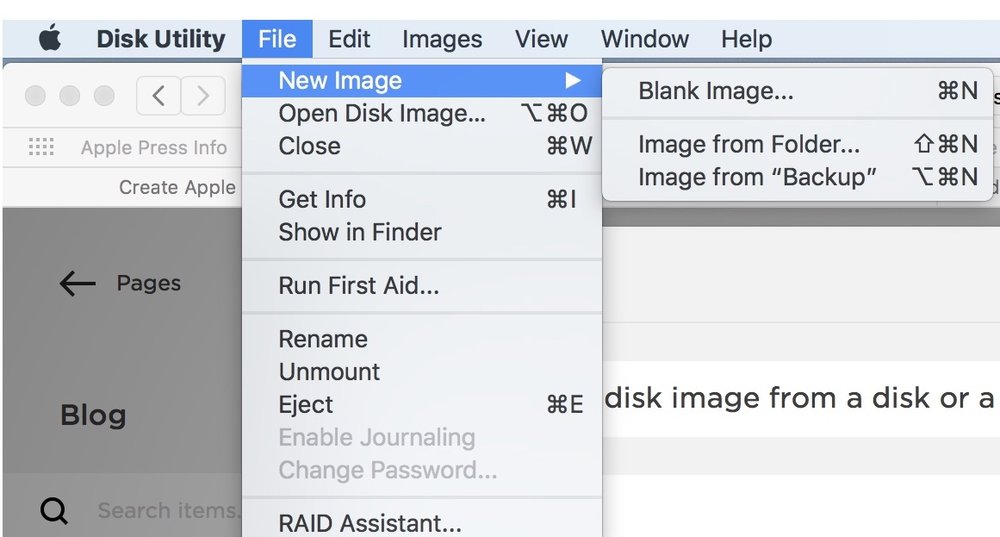
You can use the Disk Utility in macOS High Sierra to create a disk image from a disk or a connected device. A disk image (.dmg file) is a file that looks and acts like a mountable device or volume.

With Disk Utility, you can create a disk image that includes the data and free space on a physical disk or connected device, such as a USB device. For example, if a USB device or volume is 80GB with 10GB of data, the disk image will be 80 GB in size and include data and free space. You can then restore that disk image to another volume. Here’s how:
- Select a disk, volume, or connected device in the sidebar.
- Choose File > New Image, then choose “Image from [device name].”
- Enter a file name for the disk image, add tags if necessary, then choose where to save it. This is the name that appears in the Finder, where you save the disk image file before opening it.
- Click the Format pop-up menu, then choose an option:
- Read-only: The disk image can’t be written to, and is quicker to create and open.
- Compressed: Compresses data, so the disk image is smaller than the original data. The disk image is read-only.
- Read/write: Allows you to add files to the disk image after it’s created.
- DVD/CD master: Can be used with third-party apps. It includes a copy of all sectors of the disk image, whether they’re used or not. When you use a master disk image to create other DVDs or CDs, all data is copied exactly.
- To encrypt the disk image, click the Encryption pop-up menu, then choose an encryption option.
- Click Save, then click Done.
Disk Utility creates the disk image file where you saved it in the Finder and mounts its disk icon on your desktop and in the Finder sidebar.
A word of warning: don’t create a disk image of a disk that you believe to be failing or that contains corrupted information. The disk image may not serve as a reliable backup.
(This how-to is based on my experiences and info on Apple’s support pages — where the images sometimes come from.)
