Like many parents, I want my children to be technology savvy, so I encourage them to use my Apple gear in ways that are educational and fun. They already know how to use my iPad for games, but I want them to explore the creative side of the device and understand how powerful it is as a content creation tool. One of the best tools for this type of exploration is iMovie, which we use to create videos that we host on Vimeo and post on a family blog.
Documenting the world
My kids love to make documentaries about everything that happens around us. Some are silly — like the slow-mo of my son burping — while others are more interesting, like the short of the dogs chasing squirrels. I let them have free range with my iPhone when the moment strikes. My children have no shortage of moments they want to capture, just look at the 200 videos and 800 photographs in my Camera Roll for evidence.

Moving beyond the recording
My children love filming; the tough part is getting them to take the next step — production. Filming is a creative act in itself, but I want them to appreciate the next step of turning their recording into something meaningful for other people. This is where iMovie shines.
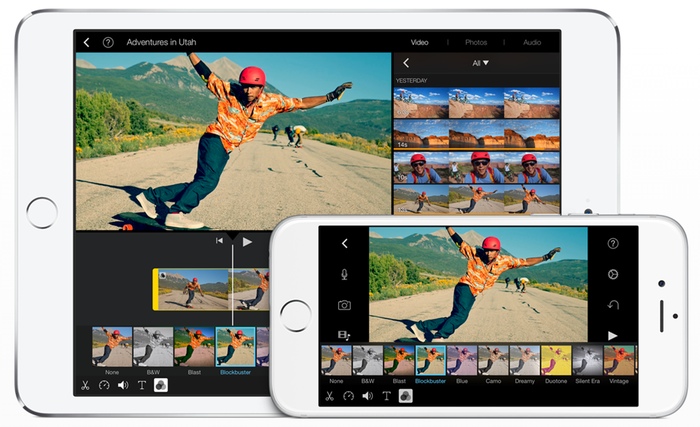
After a recording session is done, I transfer the iPhone videos to my iPad using AirDrop. I then set my children loose with iMovie on the iPad. The iPad version of the video editor is perfect for children as it is easy to use, but still has enough themes, transitions and other options to make the editing process challenging.
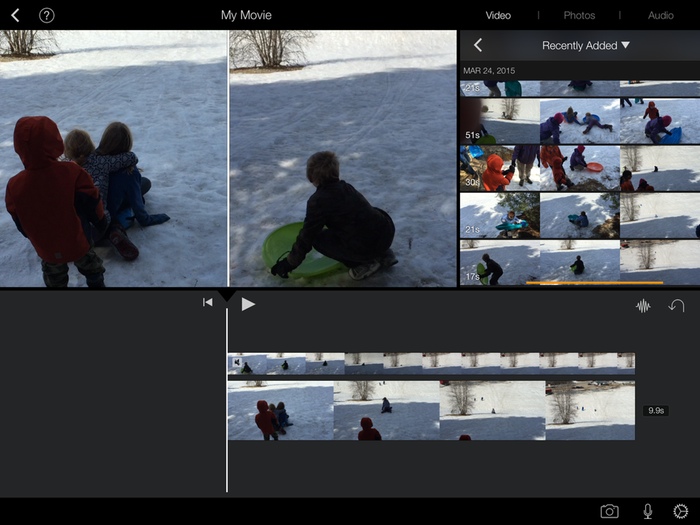
Using iMovie on the iPad, my kids can overlay text on their videos, split clips and slow down sections of the video. They even create videos with two clips playing at the same time in either a side-by-side or picture-in-picture orientation. This dual-video effect was very popular during sledding season as they could show two videos of them flying down the hill at the same time. They even learned how to trim and time the videos so the inevitable wipeouts at the bottom were simultaneous.

Besides movies, iMovie also makes it easy to create trailers, which are a shorter, but equally effective way of communicating visually. These trailers are a bit more scripted than movies, but they challenge my kids to think differently about movie making. With movies, my children would record the videos first and then get creative with them. With trailers, my children think of the trailer first and then record videos to fit the presentation.
Sharing the videos
One of the easiest ways to share these iMovie videos is via Vimeo. Vimeo is built into iOS, allowing you to add your account login into the settings app and making it available across iOS. Once you’ve entered your Vimeo credentials, you can upload to Vimeo directly from within iMovie. The movie editor will render the video, upload it to the hosting provider and even alert you when the upload has been completed. Once a video is uploaded, it can be shared on other websites, or, in my case, on my family blog.
A basic Vimeo account is free, but I pay extra for a Plus account, which costs $60 per year or $9.95 per month. Vimeo Plus is a step up from the free account, offering up to 5GB of HD video storage space each week, priority video conversion and HD embedding. All Vimeo videos play back wonderfully on a variety of platforms, including the iPhone and iPad.

Two of the most important features of a Plus account are player customization and domain level privacy. Player customization allows you to determine which information appears on a video when you embed it on your website. To make it easy for my family to view a video, I remove my account portrait/avatar, title and byline as my family knows who is creating the video. I also limit the available controls so they can simply play the video and not accidentally tap “Share” or “Watch Later.” These settings can be saved as presets, allowing you to apply a variety of changes in just one click.

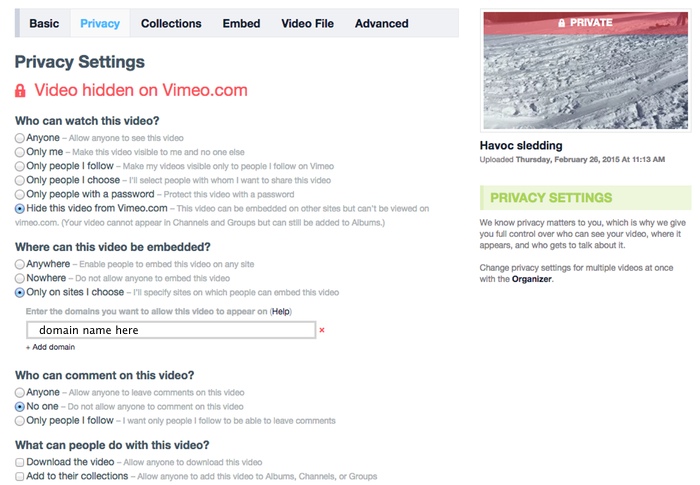
Vimeo also has domain level privacy settings that allow me to control who sees the videos and where they can be embedded. I don’t want videos of my children publicly available, so this feature is important to me. I can hide the video from Vimeo and specify the domain(s) on which the video can be embedded. I also can turn off comments and prevent people from downloading the video or adding it to their collections if they have a Vimeo account. The video appears on my blog and only on my blog.
Posting to a website
Once iMovie has uploaded the video to Vimeo, it only takes a few minutes for Vimeo to convert the video into a web-friendly format. During that time, I can login to my Vimeo account on my Mac, change the privacy settings for the video and apply the player customization preset. I then can copy the embed code from Vimeo and easily paste it into my blog. As I am finalizing the video, my children are writing the post to accompany the video. Together, we correct grammar and tighten up the writing before hitting the publish button.
Do you have your children record and edit videos? What tools do you use to accomplish this task? Share them in the comments.
