During these days of working from home and possibly having some extra spare time, we have some useful tutorials for you that can help build your skills. One of these skills makes use of the Forms feature in Apple’s free Numbers spreadsheet app to capture data wherever you may be. Grab your iPhone or iPad and join in as we create a sample form in Numbers.
Make a Spreadsheet for the Data You Wish to Analyze
You’ll need to know what data you want or need to capture. We’ll create a spreadsheet in Numbers that has the data fields in individual columns, with each row being a separate record. For example, we’ll make a spreadsheet for tracking credit card expenses. Our fields, or data points, are:
-
Date and Time we made a credit card purchase
-
Card Used (this assumes that we have more than one credit card)
-
Vendor (where we made the purchase)
-
Amount of purchase
-
Category (if we want to see how much we’re spending on certain items)
-
Notes (general comments on a purchase)
Launch Numbers, then tap the + button in the upper right corner of the screen to make a new spreadsheet (or table, as it’s referred to by Numbers), and select “Blank” from the list of templates provided by the app.
Starting at the top of the spreadsheet in row 1, we’ll enter the field names. Tap on cell A1 (the upper left corner of the table) and type the field name. To start with, we’ll enter Date and Time, then Card Used, Vendor, Amount, Category and Notes. The basic spreadsheet table looks something like this:

We now need to add the correct format for each column. Formatting allows us to enter data in the proper way – a date and time will have a specific format, the amount will have a dollar sign and two numbers to the right of the decimal point, etc…
Column A is our Date and Time column, so tap the A at the top of the column to highlight it, then tap the Format button — it looks like a paintbrush. Select Date & Time as the format to be applied to the column, tap the info button ( a circled “i”) to select a date format (I selected M/D/YY, like 4/3/20) and a time format (H:MM, like 4:32).
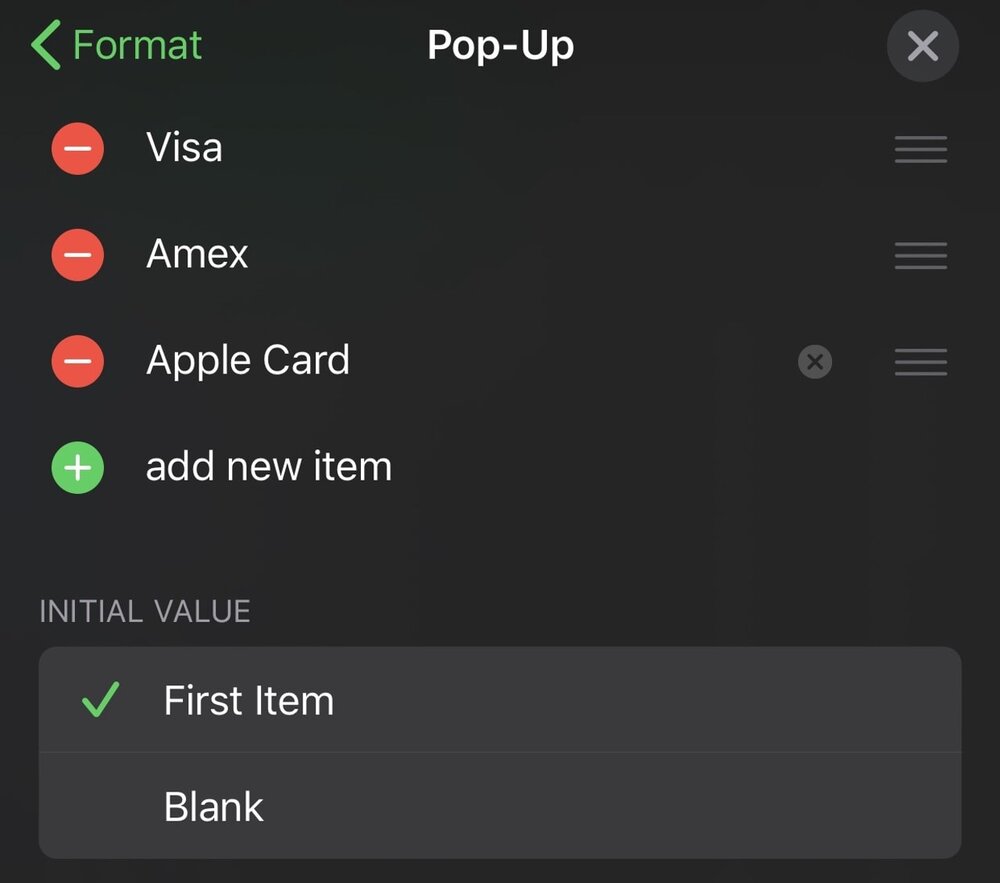
Other formats are easier. The Vendor and Notes columns are just Text, and the Amount column is formatted as Currency. To make entering information fast and easy, I selected “Pop-Up Menu” as the format for the Card Used and Category columns. This lets me create a pop-up menu containing a set of common entries. For Card Used, I entered Visa, Amex, and Apple Card. By doing this, when I go to the Card Used field on my form, a pop-up menu lets me select one of those three credit cards with a tap. I did the same for Category, adding pop-up menu items for Automobile, Groceries, Entertainment, Restaurant, Taxes, and so on.

Once formats have been set for all of the columns on the spreadsheet, it’s time to create the entry form. Note that if your spreadsheet shows more columns that you have fields, you should delete those extra columns by tapping the column letter, then tapping “Delete”.
Creating the Form
Numbers for iPhone and iPad is smart — it is designed to automatically create a form for easily entering information into our fields. By tapping the gray + button on the top left of the spreadsheet, we’re asked if we want to create a new sheet or a new form. Select New Form, and Numbers immediately creates the entry form.

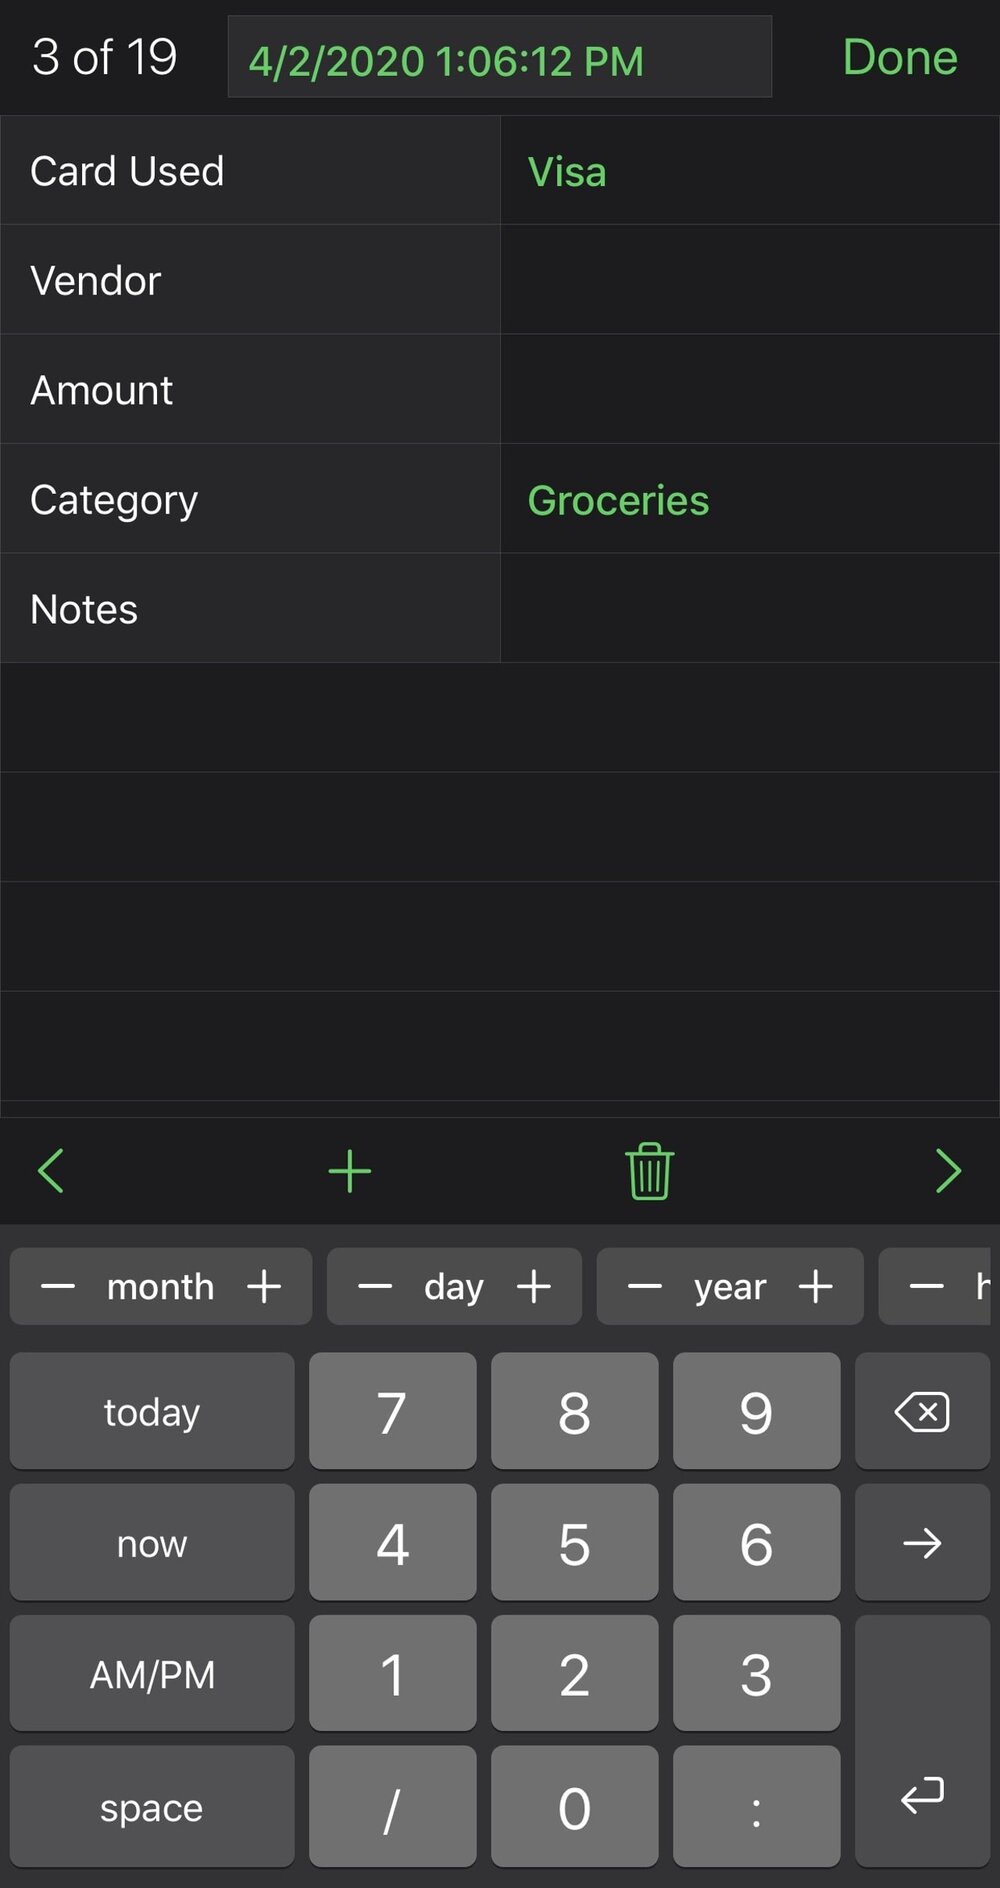
What you see is a simple form that’s easier to enter data info — particularly without a keyboard — than typing into a spreadsheet table. The 3 of 19 indicates that this is record 3 of 19, and there’s a field at the top of the unfilled form that says “Tap to add title”. That’s actually our Date and Time field (Column A), and since it was formatted as date and time, tapping it brings up a time and date entry keyboard (see image above). Tapping “now” automatically enters the date and time of the entry.
Now tapping on Card Used reveals the pop-up menu created earlier, from which I selected Visa. Tap on Vendor, and here I can use the keyboard to type the name of the store. Tap Amount, and a numeric keypad appears for entering the dollar amount for my charge. Category displays another pop-up menu with my different categories listed, and Note shows a text field that I can type a short note into (like “bought ground beef”).
Tap Done at the top of the screen, and the entries made on the form are added to a new row on the spreadsheet. Each entry I make is added as a separate row to the spreadsheet.
You might notice that the spreadsheet is listed as Sheet 1 and the form as Table 1. To make this look a bit nicer, I tapped and held those default titles to change them to “Charges” and “Enter Charges”.

Our form is useful both for making new entries and for editing existing entries (see image above). Using the left (<) and right (>) arrows on the bottom of the form, you can navigate to earlier or later entries. To delete an entry, tap the Trash Can button, or tap the + button to add a new entry.
Analyzing the Data
With a real database like this, there’s a lot you can do once you’ve entered information. Now, my wife and I use the same credit cards and accounts, to I want to share this database with her. To do that, I tap the “Add People” button on top of the spreadsheet. Now we can both make entries into the database, even at the same time. Perhaps I need to share the database with my accountant. Tapping the More button (…) on the top of the sheet, I select Share, and have the option of sending the spreadsheet via AirDrop, Mail, or Messages. To save the Numbers sheet as an Excel .xlsx spreadsheet file or a PDF, I tap the More button and select Export.
This post isn’t meant to be a full tutorial on Numbers, but there are a few handy things I’ll tell you about. You can use Filters to further organize your data. Tapping the Filters button gives me the options of sorting my data, filtering it (in other words, only showing rows that match rules I specify), or group rows into categories.
If I want to see my data grouped by the type of credit card I used, I can tap Filters, Categories, Add a Category, and select Card Used. Sorting the Date and Time column, looking at my Charges spreadsheet shows the entries grouped by card (see image below):

Now, can you use this spreadsheet on the Mac or iCloud versions of Numbers? You can, but you won’t see the form! Only the charges spreadsheet will be visible. With any luck, Apple will rectify this issue in the future!
User Guides for Numbers
Need to know more about how to use Numbers? Apple has free user guides available for download at the links below.
