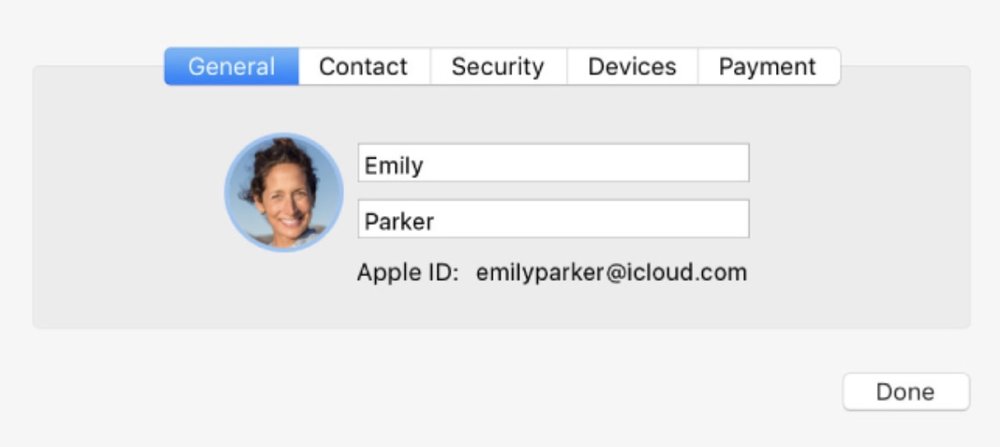
You can change your iCloud name and photo, and your iCloud contact, security, devices, and payment information in iCloud preferences in macOS High Sierra.
You can change your iCloud name and photo, and your iCloud contact, security, devices, and payment information in iCloud preferences in macOS Sierra.
To change the general info:
• Choose Apple menu > System Preferences, click iCloud, then click Account Details.
• Click General, then view or change the following:
• First and last name: Enter the name you want associated with your iCloud account.
• Apple ID: Identifies this iCloud account.
• Picture: Click your picture, or drag an image file from the Finder onto the picture, then do any of the following:
• Use a picture included with macOS: Click Defaults, then select a picture.
• Take your picture using your Mac: Click Camera; when you’re ready, click Take Photo.
• Use a picture from the Photos app: Click Photos. To see specific photos from a time, place, or album, click a disclosure triangle below photos, then select a group of photos. Select a picture, then click Next.
• Use a picture from the Photo Booth app: Click Photo Booth to see pictures you’ve taken using your Mac and the Photo Booth app. Select a picture, then click Next.
• Zoom in or out: Drag the slider left or right.
• Move the picture: Drag the picture around within the circle.

To change contact information:
• Choose Apple menu > System Preferences, click iCloud, then click Account Details.
• Click Contact, then view or change the following:
• Email addresses: Add and remove email addresses and phone numbers associated with your iCloud account. Friends and family can use these to share notes and documents with you, and reach you using iMessage, FaceTime, Game Center, and more.
• Primary address: Change the mailing address for your iCloud account.
• Email preferences: Select the kinds of information you want Apple to send to your iCloud email addresses.
To change security information:
• Choose Apple menu > System Preferences, click iCloud, then click Account Details.
• Click Security, then view or change the following:
• Birthday: You can change your birthday if it’s incorrect. It’s used to help verify your identity if you forget your password or need to reset it. You can change your birthday once, and you have 24 hours after changing it to correct any mistakes you made. A child under 13 (age varies by country or region) can’t change his or her birthday.
• Password: You can change your password to protect your information stored in iCloud and the ability to locate or remotely erase your Mac using Find My Mac.
• After changing your iCloud password, make sure you update it in any third-party email apps you use to get your iCloud email.
• Security question: If this option appears, you can change the security questions and answers that help Apple verify your identity. This option doesn’t appear if two-factor authentication is turned on.
• Rescue Email Address: If this option appears, you can add or change the email address where Apple can send you a link to confirm your identity and let you reset your information should any security issues arise. This option doesn’t appear if two-factor authentication is turned on.
• Notification Email Address: If this option appears, you can change the email address where Apple sends a copy of all Apple ID email sent to your primary email address (shown in your contact information described above). For information about when this option appears, see the Apple Support article About your Apple ID email addresses.
• Two-Factor Authentication: Shows whether your Apple ID has two-factor authentication turned on.
If two-factor authentication is on, and you need a verification code to sign in on another device or at iCloud.com, click Get Verification Code. If two-factor authentication is on and you want to add trusted phone numbers, click the Add button, enter a phone number and select a verification method, then click Continue.
(This how-to is based on my experiences and info on Apple’s support pages — where the images sometimes come from.)
