
Sometimes it’s nice to do some thorough housecleaning on your Mac. This could mean doing a “clean install.” A clean install is a software installation in which any previous version — and all its files — are completely eradicated.
The alternative to a clean install is an upgrade, in which elements of a previous version remain. For example, when I did an upgrade of macOS Sierra on my Macs, elements of Mac OS X El Capitan remained. If I had done a clean install, those elements would be history.
If you decide to do a clean install on your Mac, back up all your important files in case something goes wrong. So if you want to do a clean install of macOS Sierra, first create a bootable drive of the operating system, then:
- Make sure your Mac is online.
- Click on the Apple icon ().
- Choose Restart from the drop-down menu.
- Hold down Command-R when you hear the startup chime — and keep holding ‘em until your Mac reboots.
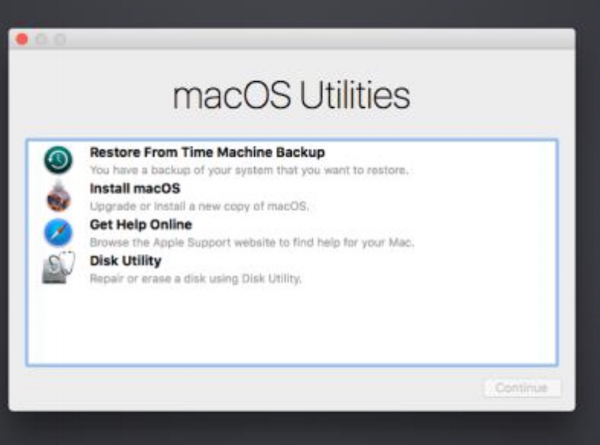
- Click on Disk Utility in the OS X Utilities selector.
- Click Continue.
- Select your Startup Disk.
- Click on the Erase tab at the top of the window.
- When your Mac’s startup disk is formatted, return to the Utilities window and choose “Install macOS.”
- Select your startup drive when asked where to install the OS.
- Follow the onscreen prompts to complete the installation.
